Thursday, July 25, 2013

Tis the season for composting

Composting is great. Right? Yeah! Really. We know this, so I'm not going to go into why. What I am going to talk about is how, usually, composting is a great thing that you can't (or don't) get enough of.

So you pile up your garden and kitchen scraps all spring and summer. You pull weeds and add those to the pile. Maybe you even dump some lawn clippings in there. All spring and summer you have this beautiful pile of material just composting away, home to millions if not billions of perfectly happy thermophilic bacteria doing their happy little thing.

Come spring, you go to add that beautiful compost to your garden and realize that you should really have about 5 times as much as you have. At least that's how it always works for me. No matter how hard I tried last year, I don't have enough compost this year. Personally, I choose to use no commercial external inputs (stuff I bought to improve something) to my garden. In fact, the only purchased external input to any of my food production is the occasional bag of chicken feed, especially during winter. This means no fertilizers, organic or otherwise. My only sources of fertilizer for my gardens are compost and chicken poop. I acknowledge that the chicken poop is at least partly external, but that's a work in progress as well. It takes a LOT of finished compost to properly amend 1500 sq feet of garden, and that's if I ignore the sweet corn patch, potato patch, and pumpkin patch. The way I calculate it, a pile of finished compost 4 feet high and 4 feet square is enough to put 1 inch of finished compost on about 800 sq feet of garden. That's only about half of what I'm going to need at a minimum, come spring. Maybe less. So my goal is two finished compost piles 4 feet cubed by spring, and this is how I'm trying to help get there.

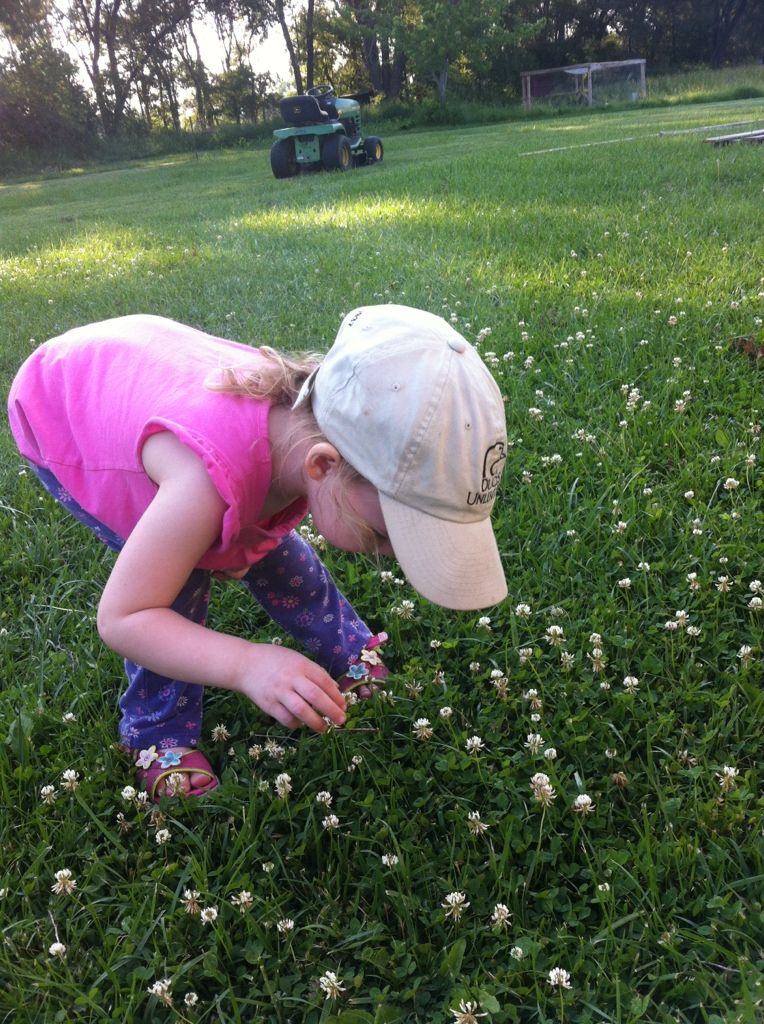
My beautiful daughter picking clover flowers. We mow and rake this stuff up for the compost bin.


Compost everything but the kitchen sink. Almost. Newspapers, junk mail (no plastic or glossy papers though), eggshells and all food scraps that don't have meat or oil in them. Tissues and paper towels used for wiping hands, etc. Leaves, grass, weeds, sawdust, and straw. Think about how much of this stuff you might throw away in a year and put it in your compost pile. Cardboard should be torn up or shredded first. I rip up paper too.

Don't waste lawn clippings. If you have a lawn, especially this time of year, it's tempting to just blow the clippings back down and let them mulch. They're usually short as the summers dry out the ground and the grass doesn't grow as much. If you can, let the grass grow a little longer and then bag or rake it up for the compost pile.

Do you have some space that you didn't plant this year? Seed it with yellow or white clover and grow compost. Really tall clover plants get a woody stem and don't compost as easily, so if you plant clover you should compost just before it flowers. The stems are still not too tough and it's at its nitrogen fixing peak. Pulling the roots up with the plant will move those nitrogen fixing nodules into your compost bin.

If you live in the country you probably have an area that you just let grow into tall grass. I mow this down, rake it up and put that in the compost bin too. This works great if you find yourself adding a lot of greens and not enough browns to the pile. Mow it down and let it dry in the sun for a few days before adding it to the pile.

Do you have chickens in a tractor or on pasture? They scratch grass all to heck, and always leave a layer of dead grass laying where they've been, especially if that grass was a bit long. I rake this up and put it in the pile. This stuff is great, it's dried and coated in chicken poop. That's about as good as compost gets.

Do you have bedding that you use for pets or livestock? I switched from using pine shavings to straw and grass bales for chicken bedding in the winter, because it composts faster than wood shavings.

If you plant cover crops, you can choose to work those into the ground where they are, or they can be chopped and added to the compost pile so you can choose where you need their nutrients later on.

If you burn natural charcoal or wood in your grill, some ashes mixed in are beneficial as well. The drawback to this is that wood ash will make your compost and your soil quite alkaline. Use wood ash only in small amounts, or offset with ingredients that will acidify the pile such as oak leaves, pine needles, or other material that is very high in tannins or acids. Of course, if you have exceedingly acid soil this is an easy way to solve that problem.

At a certain point, everything starts to look like potential compost. Some more extreme ideas:

Occasionally I walk down the ditches on the old dirt road with a machete and cut clover, pigweed, mare's tail, wild sunflowers, and other large plants. Stuff that's big enough that you can bind the stems with a string and carry them over your shoulder. I can add 10 pounds of high nutrient compost to my pile on an evening walk this way. Plus it's great exercise. You'll want to make sure that anything you cut from a road ditch hasn't been sprayed, but if you're familiar with the area, you'll probably know that already.

This time of year, my shore fishing trips end up with me dragging a lot of coontail and other aquatic weeds back to shore. Throw it in a bucket and put it in the pile too. If I had more time, I'd actually gather the stuff just for this purpose. Pay attention to where you're collecting this stuff from, though. Chemical contamination is always a concern.

With doing these things, I currently have a compost pile 4 feet high and 4 feet wide both directions, in a chicken fence bin. It's still not enough.

The next key is making sure your compost finishes as fast as possible. A full bin makes it hard to add more. Plus, if your compost bin is breaking down fast and the pile is shrinking down into finished compost, you'll be more likely to add more to it. Add a little soil from a healthy garden bed to introduce beneficial bacteria to the pile. Large compost piles are a miserable chore to turn. That usually means they don't get turned often enough. A second bin that you can move the compost back and forth between makes this much easier. Pay close attention to the moisture in the pile. large piles will hold moisture in the bottom for weeks after the top half dries out. Turning solves this problem usually, but watering the top of the pile lightly, so that only the top half gets damp, will help between turnings.

Another thing to keep in mind here is quality of compost. A compost pile composed of nothing more than grass clippings isn't going to create the quality of compost that a more varied pile will. You may end up with plenty of nitrogen, but you're risking micronutrient deficiency. The more different things you put in there, the better the compost you'll make. Also consider taking a lesson from the permaculture crowd and supplementing your compost with urine. Gross? Maybe, but urine from a healthy person who doesn't take any pharmaceutical drugs (or illegal drugs, obviously) is a fantastic fertilizer. There are studies showing that fertilizing tomato plants with diluted human urine can increase yields significantly, somewhere in the area of 50% or more. Guys, peeing on your compost pile not only adds nutrients that that the beneficial bacteria in the pile use, it also adds nutrients to the finished compost. Ladies have found various solutions to help with this process as well.

I think, oftentimes, composting is looked at as a method to dispose of scraps, and that's all. However, by investing a little more time and attention in composting, you will also create the perfect soil conditioner for your garden, fertilizing and improving soil tilth at once. And it doesn't have to cost you a dime.

Tuesday, July 9, 2013

Chick Basics

It seems that over the last few years, chicken keeping has become more popular, especially in rural areas. Farm yards that previously had only a shaggy dog or two now seem to often have a small flock of chickens, or as in the case of my (almost) neighbors, turkeys, guinea fowl and peacocks. This really isn't surprising, considering increased awareness of food quality and safety as well as a general consensus that the quality of the food we buy in stores just isn't what it should be. Compared to other methods of raising your own food, a few chickens is actually a pretty low maintenance setup, once established. It's a great way to provide eggs and meat for a family concerned with what's in the chicken products they're getting at the grocery store.

Chickens are for anyone who has the appropriate space and time to dedicate to them, and the desire to make some interesting friends that will help turn kitchen scraps and some grain into eggs for breakfast. That's pretty much what chickens do. They turn stuff you can't eat into stuff you can. If you cook a lot of meals at home and tend to have a lot of leftover vegetables, bread, grain products etc, chickens will happily convert all of that into eggs for your next breakfast. Add in a bit of commercial chicken feed and/or some scratch grains, and six laying hens will provide you with 10-12 dozen eggs a month during the summer. Even if you fed them entirely commercial feed for that month, they would probably eat less than 50 pounds, which costs about $16. That comes out to about $1.50 a dozen for farm fresh eggs. Try finding that deal in you grocery store. Plus, it takes only about a half hour every other day to tend to them, once you have them established in a quality coop with a proper run.

Most people have their first interaction with chickens in the spring, when the farm supply stores carry chicks. Spring and summer are the best times to bring new chicks home. In fact, if you live someplace where the winters get cold, spring or early-mid summer is about the only time to start. If you're looking at layers, they need to grow and feather out well before it gets cold, and raising meat birds in winter would be an exercise in frustration (where I live at least) without a well heated building. Young chicks can not tolerate cold drafts, and even juvenile birds would have a difficult time in an unheated coop on a night where the temps dip to around -30F as they do sometimes here. The best bet is to obtain layer chicks in the spring or early summer so they can grow strong before winter comes, and to raise and butcher meat birds during the summer. Of course, if you have warm weather all year, this doesn't apply.

So I ran out and bought two layer chicks! Now what?

As it is all too often, purchasing chickens can be an impulse buy. You're walking through your farm supply store in April and there they all are, hopping around and peeping your (or your daughter's) name. They're so cute! Mom/Dad, can we get one please? No wait, we better get two (or twelve!) so they don't get lonely. It's almost impossible to say no, especially if you've ever thought about trying your hand at chickens. It's the perfect excuse, isn't it?

Hopefully you put some thought into the actual keeping part before you left the store. Some places sell a chick starter kit that has a small feeder, some feed and a waterer. If you didn't, that's no reason to panic either.

First off, chicks need shelter of some kind. Most chicks you see at a store or that you order are 1-3 days old. They have only light fluff feathers and almost no body mass to retain heat. That pretty much means that one icy breath from my ex-mother-in-law could kill them. They are very delicate little critters. At this stage, shelter can be quite a few things. Depending on how many you have, a box with some sawdust or straw in the bottom might do it. For my purposes, I have box made from scrap wood that I set out on the floor of the barn when I bring home new chicks. This brooder is made from scrap wood, and is just a box without a bottom. It's about six feet square and about 18 inches high. This will keep the chicks enclosed and keep any drafts off them until they're about 3 weeks old as long as I don't overcrowd it. Some kind of supplemental heat is almost always necessary, unless you have an 80 degree room to keep the brooder in. Most commonly, a heat lamp is used. Start the lamp out about a foot above the chickens' heads, and raise the lamp a few inches every few days, as they grow feathers and need less and less supplemental heat. Make sure there is an area where they can get away from the heat as well, in case they want to cool off a bit. You can tell if they're cold or warm by how close they huddle to the lamp, or how far away from it they wander.


In a pinch, a small bowl of water and a cat or dog food dish full of chick starter will do the trick. One thing to be cautious of is that a chick can and will drown in a bowl of water. If you have 10 chicks running around in a brooder, it's actually quite likely that one will fall into the water. Even if it doesn't drown, the chill from being wet could mean death if it doesn't find its way to some warmth. A chicken waterer is ideal. It holds plenty of water for a few days and they can't fall into it. One trick to help keep chicks or chickens from kicking their water full of sawdust, straw and poop is to elevate the waterer slightly. In my winter coop, my heated waterer sits on top of an old tire rim laid on its side. This keeps the water much cleaner. In the brooder, I just set it on a chunk of 2x6 from the scrap pile. An old phonebook would probably do it too.

What to feed is a pretty simple question with a lot of potential answers.The simplest answer for a first time chicken keeper is to buy commercial feed. I recommend a quality commercial chick starter for the first 4-6 weeks for layers. There are several good varieties, personally I use Purina when I buy any kind of feed, but I have used others as well. Medicated or non-medicated is a question worth putting a little thought into. Personally, I don't agree with giving medicated feed. I treat animals for illnesses they have, not for what they might get, but that's a decision you will make based on your own plans and ideals. After that period, switch to either a flock raiser feed containing about 18% protein, or a layer mix containing about 15-16% protein. The protein is critical for egg formation when the chickens reach laying age. Too little protein will mean either low or no egg production.

Once you're set up with shelter, food, and water, the next step is to get into the routine. I change water in bowls daily, even if it looks clean. If you're using a bucket with nipples or some other sealed watering method, you can obviously go longer as the water can't be easily contaminated by the birds. Bedding should be changed whenever it is visibly soiled, or there is a smell of ammonia or any other nasty smells. Pine shavings are good for young chicks, as you can pile it up a few inches deep, and it won't need to be changed as often. Straw works too, but it absorbs less. Feed should be available at all times for such young birds. A ready supply of food and water helps them stay warm and healthy.

So, to summarize, the basic principles for new chicks are:

Give them adequate shelter
Keep them warm
Give them quality food
Always provide clean water
Keep them out of their own waste
Make sure they have enough space to move around

It's really that simple. This will get you through the first few weeks, giving you plenty of time to think about things like building chicken coops, paddock shift designs, and natural feed mixtures.  :)