Wednesday, July 2, 2014

DIY incubator

How I built a $6 incubator that achieved a 71% hatch rate.

Important Note! Please use your own common sense. You'll be working with electricity, water, sharp tools and heat. If something doesn't make sense, or seems unsafe, stop and consult an expert before proceeding. Please don't hurt yourself.

A few months ago, I was standing in my local farm supply store, looking at the tanks of chicks, pondering what I wanted to do to expand my flock of laying hens. This is a pretty common place for me to find myself in April, to be honest. I stand there, thinking about how ridiculous it is to spend $2.69 on a chick that someone else hatched. Am I going to keep buying a few chicks every year like this? I go to great lengths to avoid buying a $15 sack of feed, but I spend the same on a few chicks every spring? Not to mention the risk associated with introducing outside birds to the flock year after year. Compound the risk over several years, and the odds that a disease outbreak could wipe out my back yard flock go up dramatically.

After some thought, this seemed like a simple enough decision. Yep, I was going to get an incubator and hatch my own eggs. Amazon, here we come! Aaaand hold on a minute. Cheap incubators have terrible reviews. They just don't work that well. Good incubators are EXPENSIVE. Well, $150 might not seem expensive, but to me that's a fortune to spend on something that is supposed to save or make me money. I could buy a whole lot of eggs from someone else for $150.

At this point my mind shuts down. This is a dilemma. I sit at the table and explain the situation to my wife and she looks me square in the eye and says "Why don't you just make one?"

Uh. Hm. I dunno. I mean, I hadn't thought of that. Here I spend every weekend tinkering with stuff, building things out of salvaged and scrounged materials and it never occurred to me to just build one. My wife's brilliant, really.

So, I did a lot of research on incubators. I read a TON of inexpensive DIY incubator plans, most of which had never been tested, and those that had been were used to hatch only a couple eggs just to prove that they could hatch an egg. I researched good commercial incubators. I read up on hatch success rates and the science of hatching chicken eggs as told by universities and commercial hatcheries. I talked endlessly to the two people I know well who have lots of experience hatching chicken eggs. And this design, though simple, is what I came up with after all that. A low cost homemade incubator that has been tested with documented results.
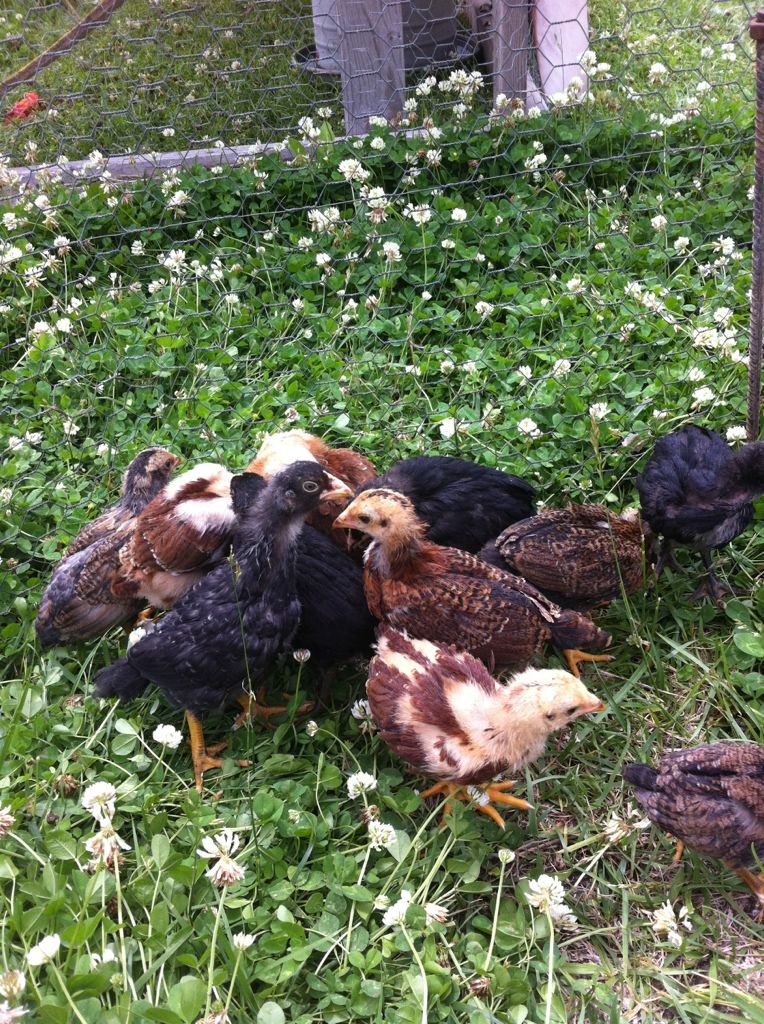
chicks hatched in DIY incubator
These are the chicks hatched in this incubator, at 3 weeks old.


Things you need:
Please note: Links are to show you what we're talking about. In true homesteader tradition, I recommend and even expect that you will scrounge this stuff from junk piles, clearance racks, and beg/borrow the whatever else you need. If you buy all this stuff you aren't saving money.

Styrofoam cooler  - something like an Omaha Steaks cooler is perfect for 15 eggs or so. It should have thick walls. It should look like this
Bottle lamp kit - Something like this or you can salvage an old lamp.
25w light bulb - Like this
Computer fan - One of these will work
Thermostat - This is what I used
12v DC adapter - Here's one that works with the fan I linked
Digital thermometer with probe - One like this works and this has a hygrometer too.
Piece of glass out of old 8x10 picture frame, or similar sized plexiglass, plastic, etc. As long as you can see through it and it's reasonably rigid.
small plastic bowl
1/4 inch galvanized steel mesh. You only need about 3 square feet of it, so if you have or can locate some scrap, that might work.

Tools:

flat and phillips screwdrivers
wire stripper (or whatever tool you're comfortable doing this with. I use a small sidecutter)
Duct tape
Electrical tape
A couple feet of tie wire or string
Something to cut styrofoam with. I use an old steak knife.
Heavy duty scissors, tin snips, or something to cut wire mesh.

First, I'm going to talk about each of the components, as some background on what their purpose is, and how to help yourself select the right parts.

Styrofoam Cooler

This is the incubator, really. The size is only important as far as it allows you to fit all the components into it, and that it will hold enough eggs for your purposes. I used an Omaha Steaks cooler that I had laying around, but you could easily use a foam shipping container or even a larger plastic cooler if you want. I'm not saying you should go buy this, but something like this is what I'm talking about. Just make sure that it's not smaller than 10x10x10 inches inside. Any smaller than that and you won't be able to fit the components. That size would probably be appropriate for 8-10 eggs or so. Ideally, you'd have 12x12x12 inches inside, or larger. You don't want the entire space filled with eggs, the chicks need a place to stand and dry off after hatching where they won't be standing on eggs or in broken eggshells. The sides of the cooler should be thick enough to insulate well and be strong enough to handle being worked with. Anything thinner than an inch is probably going to be too weak to be durable.

Bottle Lamp Kit

This is your heat source. Honestly, you shouldn't buy a bottle lamp kit. You should find an old junk lamp that's ugly as all heck and take it apart. Hit up a yard sale or auction and you can probably get one for $1 or maybe even free, if you don't already have one laying around.

25w Light Bulb

Find the chandelier style 25 watt bulb with the normal large end. I found a pack of 4 of these at walmart for $2.50 just recently. It's a good idea to have a spare bulb. If you use a particularly large cooler or box, you may need to go to a 40w bulb, but in my tests 25w worked fine as long as the temp outside the incubator was above 60F.

Computer Fan

This is any old 12v fan you can find. Take apart an old computer, stop by a computer shop and they might sell you an old used one for $2. Just make sure it's 12v and 1 amp (1000 milliamps or ma) or less. The simplest fan is the best, you don't want thermostatic controls, speed switches, or anything else to complicate the wiring. Just a plain old 12v fan.

Thermostat

This is probably the most important piece of the project. The basic idea is that the thermostat turns the light on and off to create heat, withing a pre-set temp range. The thermostat we use is normally used in a water heater, and isn't designed for fine tuning the way we need to for this project. Ideally, I would use a wafer-type thermostat, but this is what I could get easily so I used it and it really did work quite well. Commercial forced air incubators in the $150-$200 range typically hold about a 2-3 degree temp range, and mine with the water heater thermostat did that or better.

12v DC Adapter

This is to power the fan for circulating air. I'm betting you can scrounge up an old one for an ancient blackberry (sorry bb fans) or some other obsolete phone or electronic device. I say 12v, but most computer fans will run on lower voltage as long as there is sufficient amperage to start the fan. You can play around and see what works for you with your fan, but it's best if you just find a 12v 1 amp adapter and use that.

Glass

This is to make a window in the top of the cooler. You can use whatever you want for this. I used an old piece of plate glass, which is probably not the safest. Clear plastic would be best. You could probably even grind the edges off an old CD jewel case to make it flat, and use that. You just need to be able to see inside so you can monitor progress without removing the lid.

Small plastic bowl

About a 2 inch high tupperware or similar bowl that will hold about a cup of water. This goes under the screen shelf to ensure proper humidity during incubation.

1/4 inch mesh

We are going to make the egg shelf with this. We can't just lay the eggs in the bottom of the cooler, so we'll be making a shelf elevated about 3-5 inches off the bottom of the cooler that the eggs will sit on and the chicks will stand on after hatching. Nothing larger than 1/4 inch mesh, or the chicks will have a hard time walking on it. I use this mesh because I can cut it and shape it to whatever I need.


So how does this all go together?


1. Prep the cooler and test fit the light socket

Well, first of all we need to prep the cooler. You're going to make 3 holes in it, two of them near the bottom. and a third next to the fan. The first is for the lamp and the second is for the thermostat wires to come out. Please see the picture below to get an idea of the component layout. I strongly recommend following that layout. We'll be putting the lamp near a corner, but not so close to the corner that the heat from the bulb might melt the styrofoam and to allow better heat circulation. It should be positioned so that the light bulb is at least 1 inch away from the adjacent side. Position the hole for the lamp so that the bulb is about 1 inch above the bottom of the cooler. Not the center of the bulb, the edge of the bulb. If the cooler bottom is 1 inch thick, you'll need to go up about 2.5 inches to get this clearance. Once you know where the lamp and bulb go and you've double and triple checked your clearances, make your hole. I did this with a steak knife, slowly carving away the foam until I had a snug fit. Once you have a hole, insert the lamp socket and make sure it goes far enough in that the bulb won't be touching the foam. If so, you may need to insert the light socket further, or possibly countersink the whole arrangement so it goes in far enough.

The 2nd hole is for the wires that go from the light socket to the thermostat and back. You can make this hole just by pushing a screwdriver through the foam. The thermostat will turn the light on and off as the temperature fluctuates. The thermostat and its wires will be positioned along the same side of the cooler as the bulb is, in the other corner. We want the thermostat far enough from the bulb that it's sensing air temperature and not radiant heat from the bulb, and raised off the bottom of the cooler. So, the hole for these wires should be about 2 inches off the bottom of the cooler and should be about 1/8 to 1/4 inch in size. Just enough to push the wires through.

The hole for the fan wires should can go pretty much anywhere close to the fan, you can see where the fan is positioned in the picture below, as well as the location of the thermostat and the light bulb. The thermostat is lifted off the bottom of the incubator using a chunk of the leftover foam cut out when the window was installed in the lid. These are small wires, so you can probably make them by pushing a screwdriver through the foam.

Note, since this is a salvaged cooler, it's got some staining and looks pretty dirty. It would also look pretty similar after hatching a batch of chicks, so make sure before starting a batch of eggs that you wash everything thoroughly. I use a cup of water with just a splash of bleach to decontaminate. This rig isn't pretty since it's all scrounged and salvaged materials, but I'm too cheap to pay for pretty. Your exact installation may vary, depending on what materials you are using, but this is the basic idea.


It should be mentioned that the placement of the fan, light, and thermostat are what they are for a specific reason. The thermostat under the fan because it ensures a steady stream of airflow so that it can react quickly to changes in temperature inside the incubator. The light across from the fan so that it has continual airflow over it to keep temperatures near it cool and to circulate warm air quickly. The thermostat is as close to the level of the eggs as possible while still being under the mesh shelf, but raised to keep it away from water in the bottom of the incubator, with the adjustment screw facing up so that if you do need to adjust the temperature after starting incubation, you can reach through the mesh shelf with a small flatblade screwdriver to do so. With the lid on, this makes a nice clean circulation with pretty much no areas of low or no air flow.

Once you have a hole for the light socket cut, test fit the light. It should fit snugly enough that it won't fall out. Remove the light socket and set it aside.

2. Wire the thermostat to the light and install the light and thermostat

Please do all wiring with the light unplugged. Don't kill or injure yourself by electrocution over an incubator. Seek advice from someone who knows electricity if you don't understand how to do this part.

The light socket's power cord will have 2 wires. A plain colored one and a striped one. Split the two wires apart, and trim about 12 inches of wire off the striped wire and set aside. Strip the end off the non-striped wire and connect it to the #1 terminal on the thermostat. Strip the ends off the 12 inch cut off wire and connect one end to the #2 terminal on the thermostat. Connect the other end to the brass colored screw terminal on the light socket. Connect the remaining end of the striped wire (still attached to the plug) to the silver screw on the light socket. Wrap all exposed connections in electrical tape for safety. The terminals aren't covered in tape in my picture so that you can see it, but before testing or operation, I cover all connections in electrical tape.

At this point, we need to test the light. Make sure you aren't touching any of the wiring, and that it's not touching any conductive surfaces. If you plug it in and you did everything correctly, the light should come on. If you did something wrong, the breaker will either trip, or the light will simply fail to come on. If it trips the breaker, your wires are probably backwards somewhere. If the light doesn't come on, check the switch on the light socket. If after this it still isn't working correctly, seek the advice of someone qualified to work with electricity. Please don't hurt yourself over this!

Assuming that everything works correctly, it's time to unplug the light, disassemble whatever wiring is necessary and install the light and thermostat into the incubator. You should only have to remove the wires from the thermostat to do this. Remove both and install the light socket into the hole you cut, and install the bulb. Next, insert the thermostat wires through their hole, place the thermostat inside the incubator in its corner, and reattach the thermostat wires. Re-tape any exposed connections and then test the light again.

3. Install the fan

The fan should be placed as close to the top of the incubator as possible without hitting the lid. This makes the air circulate top to bottom. Figure out where the fan goes, and if necessary use a strip of folded cardboard to space it 1/4 inch from the side of the cooler, so that it can draw air from the back side. Make sure that the fan is blowing away from the wall of the cooler, into the middle. Once you identify the location, make 2 holes on each side of the fan and attach it to the cooler by running a loop of wire through the holes, and around the face of the fan. Twist the wire (or tie the string) on the outside of the cooler, securing the fan in place. Quick and dirty. You can spend more

Strip off the ends of the fan wires, and strip off the ends of your 12v adapter. connect the wires of the adapter to the wires of the fan. Temporarily wrap in electrical tape and test the fan by plugging the adapter in to an outlet. Make sure the fan works and is turning the proper direction. There's only two options here, so if the fan doesn't work, unplug the adapter, and switch the wires, re-tape and try again. If it still doesn't work, it's possible that your adapter is the wrong voltage or amperage for the fan, or either the fan or adapter doesn't work at all. Ask for experienced help at this point if it's still not working. Assuming everything works, unplug and disconnect the wires, insert the wires through the hole you made for them. Re-connect the wires and wrap in electrical tape. Test the fan once more just to be sure.

4. Install the window in the lid

Lay the window piece, either glass or clear plastic on top of the lid. Make a mark around the outside of the window piece. Set the window aside and make a new line 1/4 to 1/2 inch inside the existing line. This is the line we will cut along to remove the foam. Cut out the foam with a knife, set the window over the hole. Secure the window with electrical tape or duct tape. I used electrical tape on mine, but would use duct tape if I did it again.

This is what mine looks like. Again, not pretty, but functional.


5. Test run #1

We're ready for the first test run. Set up your thermometer and hang the probe into the incubator. Using a small flatblade screwdriver, turn the temp setting on the thermostat all the way down. Put the lid on and plug the light and fan in. The light should come on and the fan should be moving air. Note the temperature in the incubator and make sure it starts heating up. Monitor it until the light goes off. It will probably turn off at about 96 degrees, depending on your thermostat. Keep watching until it comes back on. Let it cycle a couple times to make sure it works. There's no need to adjust the temperature at this time, we're just trying to make sure that all the components work. We'll do tuning in the 2nd test run. What you are looking for  is a narrow temp range. If the temp swing from low to high is less than 4 degrees, you should be ok.

Temperature discussion

At this point, we should probably talk a little about temperature control in the incubator. Once we're running, we want to hold a temperature as close to 100.0 F as possible. This doesn't mean that there can't be some temp swing as the thermostat goes on and off, the important thing is that the average temp inside the egg stays there. An egg is mostly liquid, at first, and therefore it holds heat to some extent and doesn't fluctuate temperature as fast as the air does. What this means for you is that if your thermostat turns the light on at 98 F and off at 102 F, that gives us an average temp of exactly 100 F, which is perfect. The temp inside the egg may swing between 99 and 101, but that's still ok. What we really want to avoid are large temperature swings, or extended temp swings. Just saying that the low is 98 and the high is 102 isn't necessarily good enough, if the incubator spends most of the time at 102 and only drops to 98 briefly before the light comes on. The best way to test the temperature would be to put the temp probe inside something that has the same mass and heat retention properties as an egg. One way you can do this is to put some water in 2 ziplock bags and sandwich the temp probe between them. Another would be to wrap the temp probe in plastic and submerge it in a small cup of water, about the same amount as an egg, inside the incubator. This will give you a good idea of what the actual temp inside the egg will be as the incubator goes through its cycle.

We know that chickens, and birds in general don't hold perfect temp with their eggs when setting on them. We don't expect to have a perfectly stable temp throughout the incubation. What we want to avoid are long periods of low temperature or any periods where the internal egg temp rises above 103 F.  According to my research, the IDEAL temperature for incubation is 99.5 for the first 17 days, and then approximately 100.2 for the last 4 days. Without an expensive digital thermostat this would be pretty tough to accomplish, so we aren't even going to try. We'll shoot for an average temp of between 99.5 and 100.0 F, and the only adjustments we make will be to stay within that range. This is where the memory settings on your thermometer come in handy.

5. Final Assembly

Now we need to get things buttoned up and ready for a longer test run. First, cut a chunk out of that foam you removed when making the window, and make a stand for the thermostat. You can glue it in if you want, but you want the thermostat raised off the bottom of the incubator for two reasons. First, so it doesn't get wet, and 2nd so that it is closer to the level that the eggs are in the incubator, so that it reacts to the same air the eggs are exposed to. Once you've got the thermostat situated, it's time to make a shelf out of the 1/4 inch mesh. This is simple, so I'm just going to show you a picture of one.

Excuse the dirty table, I took the pictures at our soap making station since it has the best light.


To make this, you measure the inside of your incubator. Say it's 12x12 inches. You cut a piece of screen that is 13 inches by 18 inches. You fold a half inch of mesh down on 2 sides, so there are no sharp edges, and you fold the other 2 sides down 3 inches each, to make a shelf that's 2 inches high and fits snugly inside the cooler. Now, this isn't necessarily easy. I recommend wearing leather gloves while working with this stuff, as the wire is sharp and will cut you. Also, the mesh won't make a nice perfect shape for you. If it fits snugly, though, you can make it hold its shape once it's inside the incubator. There are some considerations with this. Before you put it in place, set your bowl in the bottom of the incubator. No sense in having to take the shelf out later to put the bowl in. The shelf should fit under the fan and over the lightbulb with some clearance between it and the lightbulb. Preferably about an inch between the bulb and the screen. It sucks getting it in there, trim and re-bend until you get a snug fit all the way around. You don't want a chick getting its foot stuck in a gap. Once you've got it fitting properly, it's staying there until after you hatch your first eggs and need to disassemble for cleaning. Note: I bend the mesh over the edge of a table or workbench, with a chunk of 2x4 to act as a break of sorts.

Next, we're going to cut one more small piece of mesh to make a screen that goes over the fan. Cut a piece of screen 1 inch larger than the fan in both directions. Fold the edges over all the way around to make a box, slide this over the fan, and wrap with duct tape to cover any sharp wire edges. This guard is not installed in any of my pictures, so I apologize. The point of this is to make sure that chicks don't stick their body parts into the fan. The fan is blowing out, so it wouldn't suck them in and severely mutilate them, however they could still get injured without a screen over the fan.

6. 2nd Test Run

For our 2nd test run, we're going to focus on monitoring temperature, humidity, airflow and function over a longer period. Assemble your incubator, plug everything in, add water to the bowl under the screen (you can pour the water through the screen or use a small tube and funnel to fill. Either way works), set the temp probe on the screen at the egg level and close it up. Let it run for a half hour and check the temp. Adjust up or down using the screw on the thermostat. You need to make VERY TINY adjustments. It may not even seem like the screw moved. Remember, we're making fine adjustments with a device that wasn't designed for such fine adjustments. Tinker with this until it will run at a specific temp for a half hour without fluctuating below 98 F or above 102 F.

If your temp probe also does humidity, you can measure it there. If not, no big deal. Our target is 50% relative humidity for now, and the bowl of water and the moving air should make sure we achieve this without issues. If you want to test it, that much the better. I don't measure humidity in mine. I just try to make sure that it's humid for the first 18 days, and then REALLY humid until hatching is complete. If you're measuring humidity, you'll need to run it for a couple hours or even overnight to really know what the humidity is. If you've got the temp right, leave the lid closed for a few hours and then check the humidity.

Let the whole thing run for at least one day. Don't remove the lid during this time. If after this time the temp is still stable, you're ready to hatch eggs.

Operation Instructions and Concepts

Our incubator does not have an egg turner, so when you load your eggs, mark the top with a pencil so you have a point of reference for turning. You'll be opening the lid at least once per day, preferably twice, to turn the eggs. You don't need to turn them much, I just roll them slightly over, maybe 15 degrees each time. Back and forth until you get to day 18 and lockdown until hatch is complete. Try to keep the time the lid is off to a minimum, and after closing you should monitor for a few minutes to make sure the temp comes back up to where it should be. When you go to turn eggs, always check the max and min temperatures in the memory of your thermometer. If necessary, this is the time to adjust the thermostat. You should not have to, but just in case, this is when you do it. Make sure that if you do, you monitor the incubator for at least 30 minutes to make sure the temp is stable and correct. Remember, it's better to be 0.4 degrees off target than to keep opening and closing the incubator over and over again, constantly messing with the thermostat.

If you know anything about incubators, at this point, you're probably wondering how we increase humidity at the end of the incubation cycle. Understanding that humidity is critical while chicks are hatching, we know we need to get above 70% humidity. If we don't, the membrane inside the shell will dry out, shrink, and effectively shrink wrap the chicks inside the egg, killing them. So how do we do that? I thought about that a lot, and decided that the best way to increase humidity is to increase the surface area of the water so more evaporates. For the first 18 days, the water in the bowl has enough surface area. On day 18, I open the lid and pour about 1/4 inch of water in the bottom of the incubator. This increases the surface area of the water dramatically, and makes sure there's enough humidity. Also top off the water in the bowl at this point if we need to. After day 18, you're in lockdown mode and the lid of the incubator should not be opened. You should have enough water in the bowl and in the bottom of the incubator at this point to last until hatch is complete. Expect to see condensation on the window after day 18 with the increase in humidity.


Results

I built this incubator hoping that it would hatch something, anything. I didn't expect it to be perfect, I only expected it to be functional. Honestly, I'm very happy with the results.

I started with 21 eggs from my brother's mixed flock. He hatches eggs for his own flock in a $200+ incubator that isn't much different from this one, except it has an egg turner. His results with his eggs after 3 hatchings this spring were about 65-70% hatch rate, after subtracting infertile eggs. He has 1 rooster and over 30 hens, so some eggs will be infertile, and many of the hens are older, meaning the eggs aren't as likely to hatch. In my batch of 21, there were 4 that showed no development when candled at 5-6 days. I left those eggs in the incubator, just to see if I was right, however none of those 4 ever developed. Of the remaining 17, 13 of them hatched. 12 of those chicks survived past 3 days, and all are still running around the coop, now 4 weeks old. The one chick that hatched but did not survive did not absorb the yolk sac correctly, and when it hatched it was covered in yolk and blood. It was unable to stand and could barely move even after 8 hours. It passed shortly after that. Among the 12 that survived, there were no deformities in feet or beaks, all the chicks are healthy and growing. My success rate is 12 out of 17, for a rounded 71%.

The gross part

I decided to analyze the 4 eggs that showed development at candling but did not hatch. Of those 4, 1 looked to have quit at around day 10. There was nothing significant about day 10, I couldn't find a cause for it other than that it was a weak egg. The 2nd quitter looked like it made it to around day 15-17. Again, there was no directly attributable cause for this. The remaining 2 held fully developed but dead chicks. I shut off the incubator on the morning of day 23. It's possible that these chicks might have still hatched. I don't know. I do know that a chick hatching on day 23 has a low chance of survival. I made a note to let the incubator run to day 24 next time, just to see.

Summary

Overall, this was a successful experiment for me. I feel that this incubator can achieve the same hatching success that most of the small incubators that those of us with backyard flocks would purchase, and certainly better than the cheap incubators would do. My next plan is to build a scaled up version of this using the same principles in an insulated cabinet.



Tuesday, June 17, 2014

Growing Onions From Sets

Everyone loves onions! Except my oldest daughter. I LOVE onions. Almost everything we cook has onions in it, it seems. If I could find a way to put onions in strawberry rhubarb crisp they would be in there too. Onions are a healthy, low calorie addition to any spicy meal, and most meat dishes.

They're also one of the more difficult garden vegetables to achieve good yields of. Onions are easy to grow, and difficult to grow well.

The simplest way to grow onions is from sets. In another post someday we'll go over onions from seed, but for now we're staying simple.

Typically, onion sets found in greenhouses or at chain stores are labeled either "Yellow", "White", or "Red". Not the most descriptive packaging and not really very useful information, but generally these are day neutral onions that will grow pretty much anywhere. Though they aren't the best for storage or the largest/sweetest/etc onions you could grow, onion sets are typically a safe choice that will produce a decent crop.

Onion sets are year old onions. They are started from seed, grown for a period of time and then harvested, dried, and stored. They are easy to plant and grow because they already have all the things needed to grow a respectable onion. They have a root system, and a store of energy to restart growing as soon as they're planted.

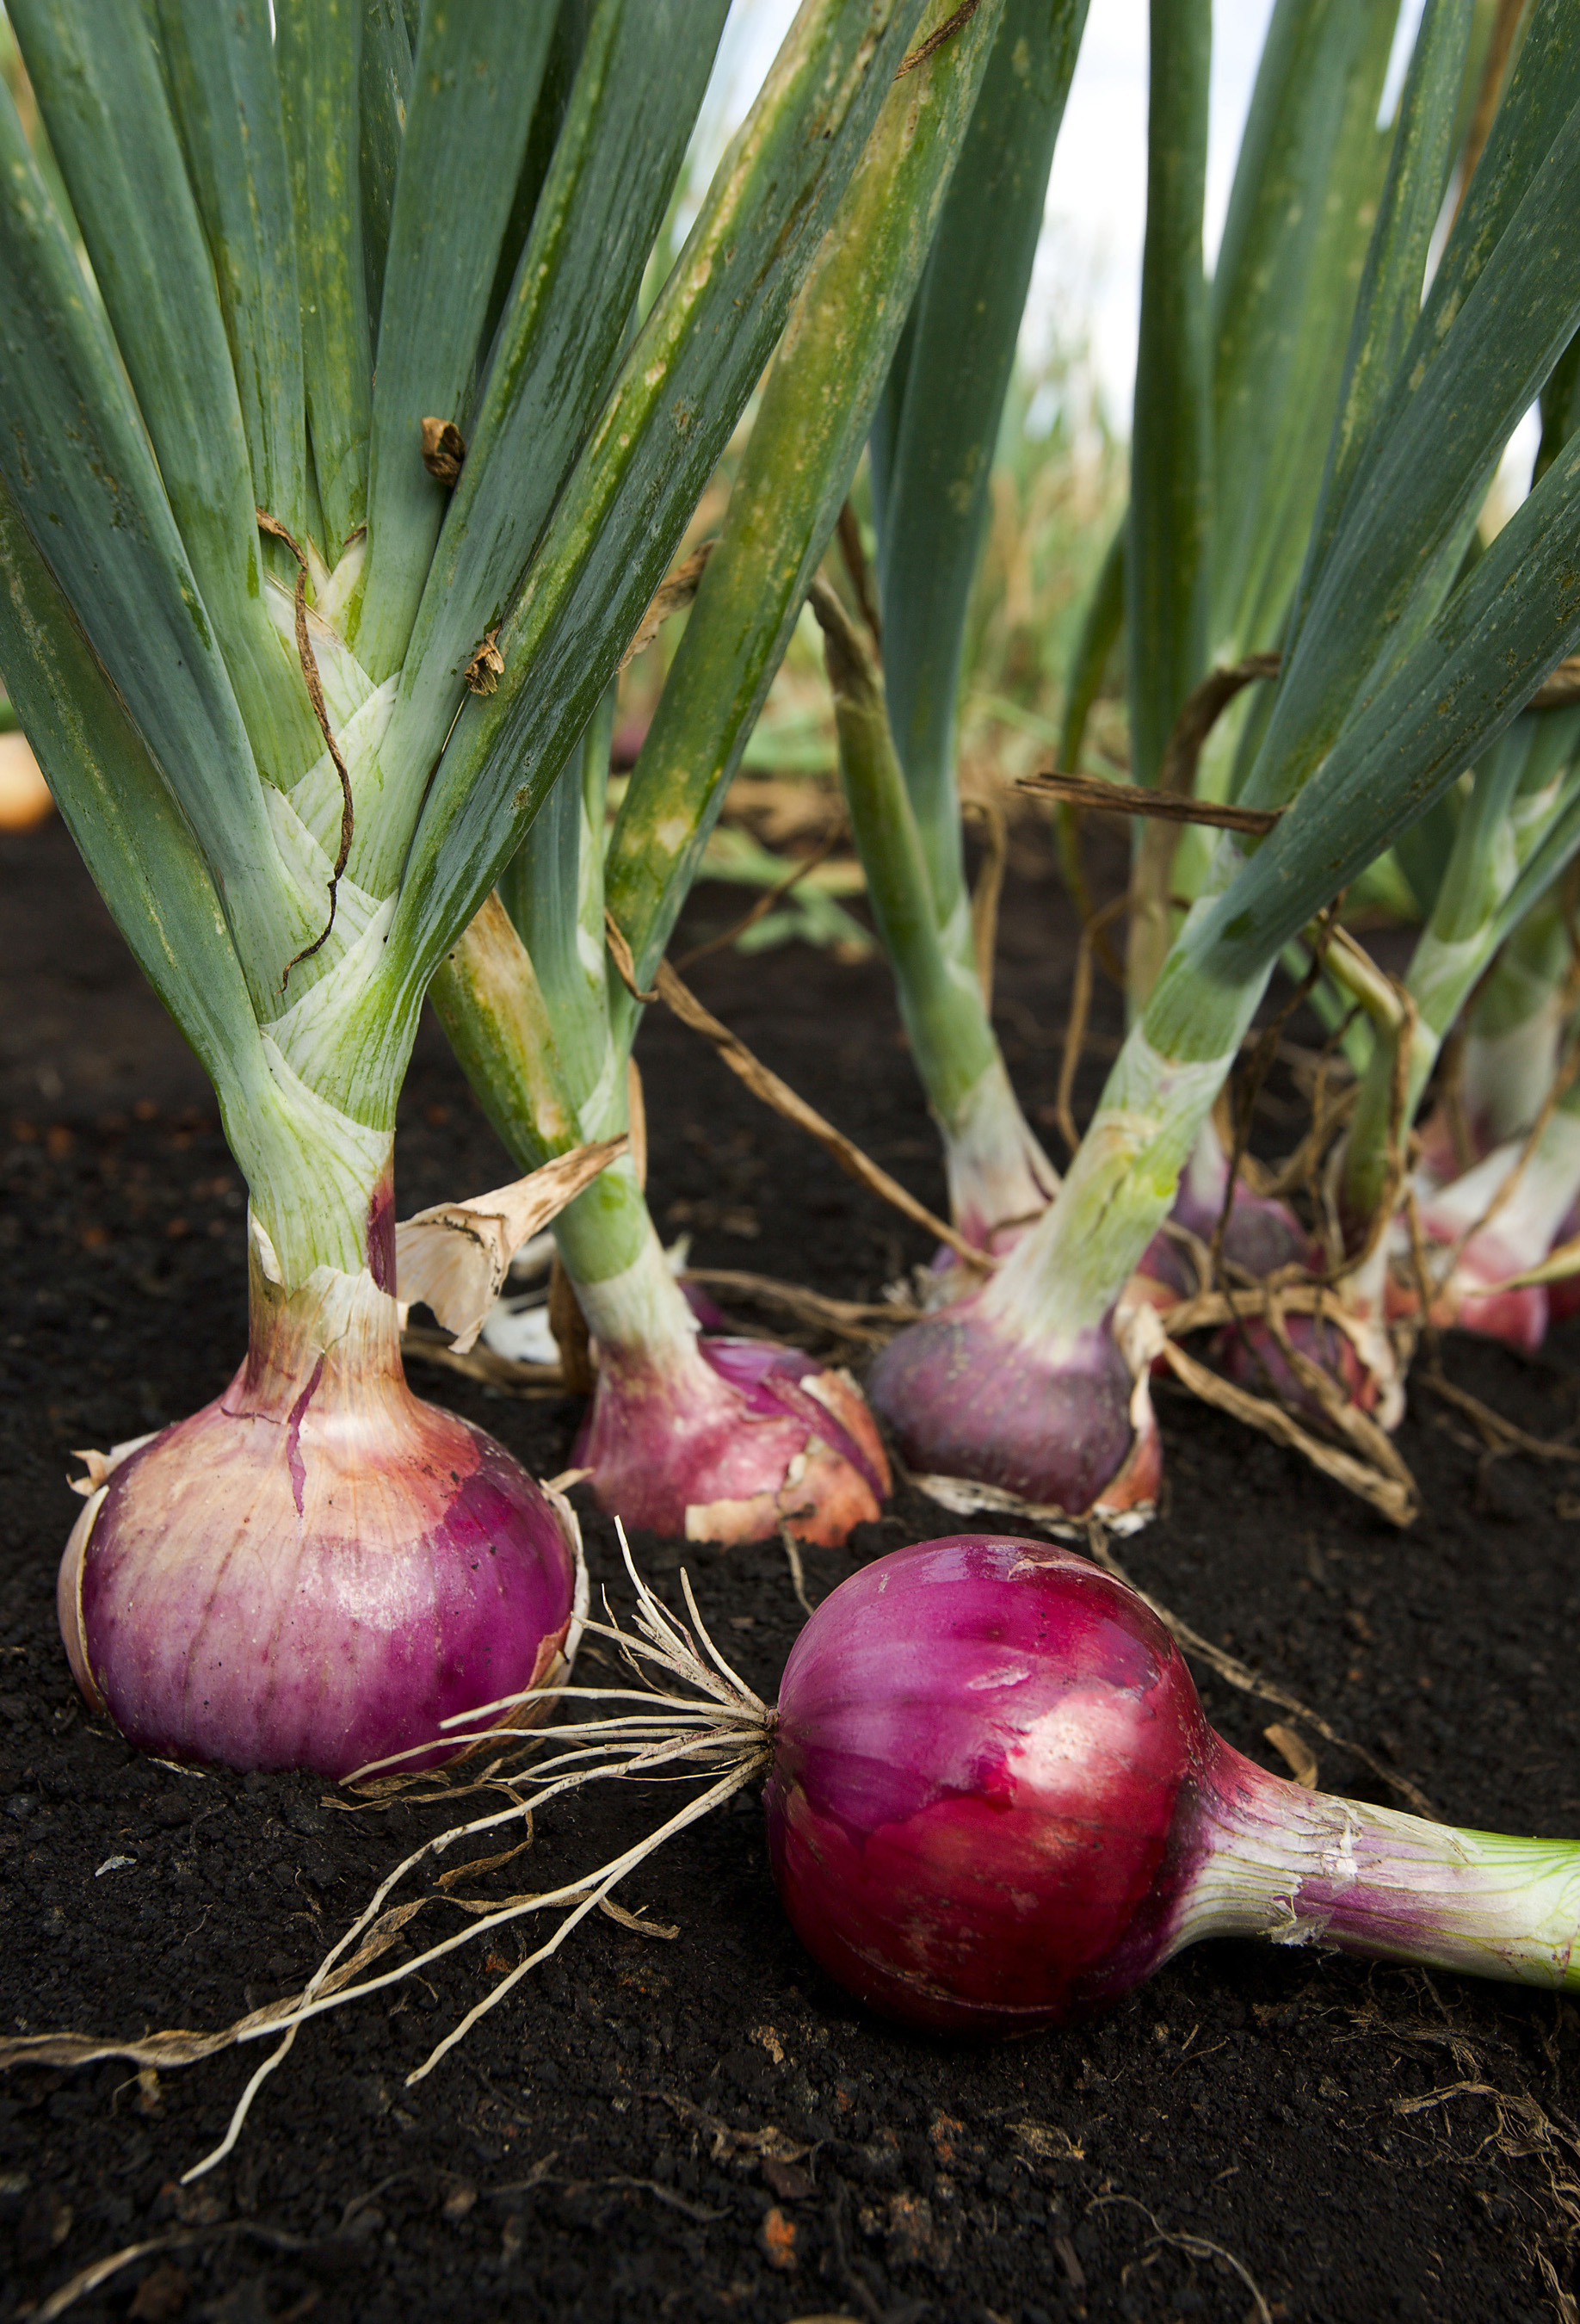
growing onions from sets
Red onions are easily grown from sets.


When and How

Plant onion sets as early as you can stick them in the ground, spaced about 3-4 inches apart. Rows waste space, plant them in a grid. You want just enough room to let them grow and so you can get your hands in there to pull weeds. Plant sets so the top is just barely poking out of the ground. The roots will be 1/2 to 3/4 inch deep that way. When I plant sets, I don't wait for the ground to dry out so it can be tilled. There might even be snow in the corners of the yard. I rake off whatever litter is on top of the soil and stick the sets right in the ground. If I have to pull weeds or last year's stalks first, I will, but I don't do any other prep to the soil. Keep in mind that I have good soil quality and I NEVER EVER EVER walk in my garden beds. I don't need to till to make the soil loose enough to grow onions, but if you have heavy or compacted soil, you may need to wait until it can be at least hand tilled before planting onion sets. The important thing is getting them in the ground as early as possible. The more cool wet days with sunshine that the onions get before it gets hot and the days start to shorten, the better your onion crop will be.

After planting, I immediately side dress with well aged compost. You can probably use a fertilizer, but I prefer compost. My compost is mostly made up of kitchen scraps, grass clippings, leaf litter, and straw from the chicken coop.  Onions are very heavy feeders, and a good layer of nutrient rich compost will help make sure you have nice big onions. I usually put down about 1/2 inch of compost on the whole area, maybe more. Make sure the onions aren't buried under a thick layer. Brush some off the set tops if necessary. After adding compost, I cover the whole area with a light layer of grass clippings if I have them. If I don't, I wait until I do. Mulching onions is very important. Because they are heavy feeders, competition from weeds using the nutrients in the soil will hurt their growth significantly. Usually, the soil is plenty wet at this time of year so I don't need to water sets after planting. If it's dry though, water them well once, and then don't water again until the very top of the soil is dry. Fewer, deeper waterings will help your onions, and all your other plants, grow deeper roots and better withstand the upcoming heat of summer.

When the onions get to be about 6 inches tall, or after they've been in the ground for 30-45 days, I give them another sprinkling of compost fertilizer, and then another layer of grass clipping mulch over the top of that. The nutrients in these layers of compost will seep into the soil for the onions to take in.

Pinching Flowers

Onions are biennial plants. This means they grow a plant the first year, go dormant for the winter, then re-grow again the second year and then flower. Onion sets, being 2nd year plants, are going to flower sometime during the middle of the growing season. For me, this happens in June. These flowers should be pinched off before they open and pollinate. This keeps the onion putting its energy into the bulb instead of seeds.

From here on out, keep the onions weeded, and well watered, and wait for the tops to yellow and tip over.

Harvest and Storage

Harvest onions when most, or more than half of the tops are yellowing and falling over. At this point, they are no longer growing larger, and are starting to go dormant. Pull onions, and lay them out in a warm but not hot, shady, well ventilated area to dry. I've got an old screen door sitting on sawhorses on the north side of my house where it's shady and the breeze blows through. If it looks like rain, bring the onions indoors until rain has passed. Leave the onions to dry outdoors for at least a week, 2-3 is better. Usually I leave them out for a few days and then move them indoors to finish drying. If they can't be left outdoors, spread them out in a dry area with good airflow to finish drying indoors. This process is called curing. When the onions are fully cured, the neck of the onion will be dry and brown and you can cut off the dry top, about 2 inches above the onion. Any onions that still have green necks are not yet dry, and those onions should be used up first as they are most likely to spoil fastest. Proper curing is critical to the storage life of the onion. I have kept properly cured onions in the root cellar for a full year before they started to spoil. You may not get onion grown from sets to store that long, but 6 months is certainly possible with proper curing.

So there you have it. Bigger onions through fertilization and reducing weed competition.


Friday, June 13, 2014

"Automatic" maggot feeder for chickens

How about a quick, easy, nearly free and slightly smelly way to supplement the fat and protein in your chickens' diet while giving them a treat?

I started doing this last year after getting the idea somewhere (I can't remember where, I'm sorry, I wish I could give credit where it is due. Really), and though I wouldn't do this if I had really close, or picky neighbors, it's worked great for us.

This is really simple. Take a 5 gallon bucket, drill a bunch of 1/4 inch holes in the sides. Don't drill any holes in the bottom or up about 1 inch from the bottom. Throw a couple handfuls of straw in the bottom. Fill with a few pounds of meat. Cover with some more straw. I suppose you *could* collect roadkill for this part, but I usually have some old something-or-other in the freezer that isn't salvageable, or I have frozen animal carcasses left over from the previous trapping season. Fish carcasses work great too, for you fisherpeople. I mean, you know what stuff attracts flies, right?

Maggots make great chicken treats.


Hang the bucket about a foot or two above the ground in your chicken run. Wait.

Ok, so it's going to smell some, there's nothing you can do about that. But, if you don't use TOO much animal material in there and you keep some straw on top of it and below it to absorb any juices, it won't get too bad.

As all the neighborhood flies find the meat, they'll lay eggs. Fly eggs become maggots. Maggots eat meat. Eventually, some maggots fall out the holes in the sides. Chickens love maggots and it's great protein and fat in their diet. Lots of times, in the evenings, I see my hens standing under the bucket waiting for a maggot or two to fall out.

A few points of caution here.

1. If you make any holes in the bottom of the bucket or very close to it in the sides, some unpleasant smelling liquids will find their way onto the ground and the smell will increase dramatically.
2. Don't overload the bucket. I put probably 2-3 pounds of guts/meat/whatever in there at a time. This will last a few weeks at least.
3. The more holes you drill the faster maggots will fall out. Don't make the holes big enough that chunks of meat fall out. 1/4 - 3/8 inch is about perfect.
4. If it rains a lot where you are, put a cover on the bucket. The flies can still find their way in through the holes in the sides.
5. If you live in the middle of nowhere and have a strong stomach, you can put holes in the bottom of the bucket. It will work better. It will also smell a lot worse. Your call on this one really.
6. One reason for hanging the bucket is that it makes it less likely that a maggot-crazed hen will get IN the bucket, which can become a very messy situation very quickly. A cover will also help, if this is an issue for you.
7. The other reason for hanging it is that when the maggots fall, it gets the chickens' attention, and they find them easier. Mitch Hedberg was right about this, snacks are better when they fall and that holds true in the chicken world as well.

When the bucket is finished and there's nothing left to attract flies, there probably won't be much smell left either. At this point you can either dig a hole and bury what's left, or you can just dump it on the ground in the run and let the birds dig through it for any remaining snacks. I usually bury it somewhere. Rinse the bucket out and repeat, if you aren't completely grossed out at this point.  :)


Monday, April 14, 2014

Grow your own chicken feed, part 2

Last summer, I undertook an experiment to grow my own chicken feed to store for winter. You can read about that here http://backyardbiointensive.blogspot.com/2013/06/grow-your-own-chicken-feed.html

All in all, the project was a success, however I learned quite a few things that are worth writing down and sharing.

First off, I learned to categorize anything stored as either a staple food or a supplemental food. Certain things just cannot be collected/grown and stored in sufficient quantities to make up a staple food. They might work for someone with different resources or more land, but for me they didn't work out as well as I'd hoped. However, they were still a part of the chickens' diet through the winter, providing some diversity and additional nutrition.

Staple foods made up about 80% of the total diet. Staple foods were:

Pumpkins and squash
sunflower seeds
corn
kitchen scraps

Supplemental foods made up the rest of the diet:

alfalfa/clover
wheat
brassica leaves
raspberry leaves
dandelion

I had hoped to store 200 pounds of dried hay and greens. In practice, this turned out to be nearly impossible without buying alfalfa bales. I could do this, but it didn't prove necessary. Pumpkins/squash and grains were actually very easy to store enough of.

Here's what I actually ended up storing and using:

150 pounds of corn, some shelled, some on the cob, mix of sweet and field corn
About a 55 gallon drum full of black oil sunflower heads with seeds
400 pounds of squash and pumpkins
About 20 pounds of dried alfalfa and clover
5 pounds of shelled wheat
20 pounds of dried broccoli, cabbage, and brussels sprouts leaves
2 gallons of raspberry leaves
15 pounds of dried dandelion

Some of what I stored simply wasn't viable feed. Unless it was ground and pelletized they wouldn't touch some of the greens. I suppose I could do this, but I really don't have the means to do this easily. Whatever of it they did eat, though, was beneficial anyway. A good amount of the squash and pumpkins didn't get used, and ended up in the compost bin. I'd say upwards of 50 pounds. Also, most of the dandelion went uneaten as they wouldn't eat the roots which were the bulk of the weight.


Sunflowers: great chicken feed and beautiful too.


With this in mind, I'm revising this strategy somewhat for this year, having learned a few things from last year.

So this will be this year's chicken feed storage plan to feed 6 hens:

55 gallon drum full of sweet and dent corn
55 gallon drum full of black oil sunflower heads
20 large pumpkins and/or equivalent mix of winter squashes
20 pounds dried alfalfa and clover
40 gallon tub filled with mix of other dried greens - especially brassica leaves
ALL kitchen scrap
grit and calcium supplement

I should be able to grow all of this in the pumpkin patch and since I can grow pumpkins and corn and sunflowers together by co-planting, it will save some space. I expect to plant half the patch in corn and half in sunflowers, with pumpkins and squash interplanted.

Another thing we'll be doing, in order to get the most of our kitchen and garden scraps, is that ALL food scraps will go to the chickens to be picked over. Whatever's left after a few weeks will then be moved to the compost bin to finish composting. To do this, I've got a couple clean blue plastic barrels that I cut down to be large dishes, about 14 inches deep, that food scraps will go into. They can't scatter them too much in the coop that way, but still can hop in and dig for edibles. These dishes have drain holes in the bottom so that any liquids can drain out and be absorbed by the straw bedding in the coop.

Now, volume of feed isn't an issue. What about nutritional quality? Admittedly, this isn't the diverse mixture of foods that chickens would get during the summer, however this did carry our chickens through the winter in good condition, although egg production suffered slightly. Nothing that would justify increasing the cost of feed by purchasing it.

It should be said that the amount of time that goes into growing and storing this feed is not insignificant. If I was running a business and had to calculate the cost of my time, it wouldn't make economic sense to grow feed. However, because I view my mini-farming operation as a closed system and my main goal is self-sufficiency and not financial profit, this all works out for me. If you're looking for a way to save money on chicken feed for a small flock, however, this probably isn't the best way to do it. If you're looking to provide for your flock and your family without relying on someone else, then you're headed in the right direction.


Wednesday, April 2, 2014

Old Tires as Garden Containers?

I like to talk about gardening, plans for gardens, methods, etc. I talk to pretty much anyone who will listen. I learn this way. I talk about my thoughts and it helps me make them more coherent. I talk about others' thoughts and I pick up new ideas for how to do things.

One question that seems to come up at least a few times every spring is the question of using old tires as garden containers. Many of us have heard stories about growing potatoes in old tires, and no doubt many have tried this method. Invariably, the discussion ends up revolving around the question of whether this is safe - whether or not the tires leach toxic/carcinogenic chemicals into the food grown in them. I have read countless discussions, blog posts, articles, etc about this, and so far, nobody has convinced me either way.

The simple fact of the matter is, though, that you shouldn't ever use tires as containers, and it has nothing to do with whether or not they're toxic. It's because as far as garden containers, or raised bed containers go, they suck. Bbbbbut they're free! No, they aren't. And they suck.

There, I said it. Put this whole issue to bed. Tires make very poor containers for growing anything. Why are we still talking about this?

Tell me how this is better than just putting them in the ground? Photo Credit: Tony Buser


Here's why they suck:

A tire wastes a lot of space. An average tire is probably 25 inches across and round, having a 14 or 15 inch opening, it's MAYBE 1 square foot of growing space. If we learned anything from square foot gardening, or any intensive planting technique, we know that round is a waste of space for anything except single plants. In the case of single plants, like tomatoes, I'll call it a tossup with a traditional 4xSomething raised bed. For anything else, like carrots or lettuce, you're wasting space.

They're too small. Would you ever intentionally build a raised, round bed only 2 feet across? I wouldn't unless it was full of sand for my cat to crap in.

They're ugly. Yep. I don't want my gardens looking like a junk yard.

Would you buy anything from a farmer's market if you knew it had been grown in an old tire? One that maybe wasn't even washed out first? I wouldn't.

They overheat the soil. That black rubber heating up the soil in april and may is probably pretty nice to have. And the rest of the growing season it's going to scorch the soil inside it even where I live in zone 4. You'll have to water twice as much. If I was going to design a device specifically for the purpose of overheating soil and stressing or killing whatever I planted in it, it would be a round black container that had a lot of surface area and absorbed as much heat from the sun as possible - a tire.

A tire in the sunlight all day every day for years on end is going to decompose down to the steel belts in less than 10 years, assuming it was a used, discarded tire in the first place. It could be much sooner than that, too. When those tire planters are down to sharp pieces of metal sticking into your knees you're going to have to do something with them, and since the EPA says they are a toxic material, that means you have to pay someone to dispose of them for you. This brings us to the final point.

Used tires are not free. You might not pay for them up front, but you'll pay for them in the long run. Either because you'll have unsightly tires piled around your property after you quit using them for planters, or because you have to pay for someone to dispose of them. My local tire shop charged me $4 per tire to dispose of the old ones that came off my wife's mini-van last fall. At $4 per square foot of garden space, you could probably hire someone to build your raised beds out of concrete block and still be money ahead.

Does it even matter if they're toxic? If we're really thinking with our gardening brains we know that tires are a poor choice even if they aren't toxic.


Wednesday, December 4, 2013

Garden Planning, Part 1

This fall there was a mad rush at our house to get the garden cleaned up for the winter. Fur trapping season was in full swing, we were still canning and freezing vegetables whenever we found a spare hour, hockey season was starting for my oldest, and life felt like it was going by way too fast. Now that we have some snow on the ground, the ponds and creeks are locked up in ice, I've had a few moments to sit back and reflect on this past gardening season. I realize most die-hard gardeners start planning for next year about 2.2 seconds after they've picked their last onion, so I'm probably late to this game.

Reflections...
Summer 2012 was a record year for our family, as far as the value of the produce we grew. The amount of food that came out of 700 square feet of raised beds really was a surprise. The really amazing part of it is that I know I can probably improve that by about 25%, after seeing where I didn't make ideal use of the space I had. There really is no substitute for experience when it comes to intensive planting.

Despite all my efforts, I wasn't able to make enough compost for next season. I'm going to have to work even harder on that next year, probably by building a second compost bin. Surprisingly, a 4x4x4 compost bin filled to the brim, turned, and filled again just doesn't make as much compost as you'd expect. At this point, when I think I have enough, I'll double it and that should be closer to enough.

There is no fertilizer on the planet better than chicken poop, as far as bang for the buck. It's more or less free and holy smokes do plants grow when treated with it. Not just any chicken poop. It needs to be composted or rotted down first. About a month seems to be the sweet spot. First thing next spring I'm going to shovel all the chicken poop I can find into a barrel, mix it with a few shovels full of dirt, a squirt of water and let it sit. Right about the time the growing season hits its stride, I'll have a great supply of awesome fertilizer to side dress with.

I grew lots of things that are nice to have fresh, but just aren't worth the effort and space. One of these, and I know this is probably some kind of heresy, is salad greens. Now I know they don't take up much space, and I love a fresh salad as much as anyone, but I don't want to commit garden space to something that I can't store for more than a couple days. Next year, greens will be grown in containers on the back deck. Along with this comes a general shift in focus away from growing all the things I love to eat to growing things that I will still have in January. Not all, I'm still going to grow greens and melons, etc, but we're going to commit more space to things that we can freeze, can, or just store for the winter. This means more tomatoes, squash, potatoes, onions, peas, beans, etc, and less of the stuff that just doesn't store well.

Next year...
I've added 7 new raised beds, expanding the total area of raised beds to 1400 square feet. I've also started preparing an additional 1900 square feet of new garden that will be shared between corn, potatoes, winter squash/pumpkins, and melons. I don't really know how I'm going to prep this soil in the spring, as much of it is still in sod. Double digging 1900 square feet of ground just isn't going to happen, so I'll probably get out the tractor and tiller and try to work some chicken poop and some compost, but in reality that soil just isn't going to produce the way my established raised beds to. I'm still looking for ideas that don't include buying a ton of fertilizer or compost to add to it.

More chickens. Our hens have an irritating habit of stopping laying for no perceptible reason. Wyandottes are great birds, but I see myself adding 6  Rhode Island Reds. I'm not sure that this will fix the problem of periodic stoppages to egg production, but at least it might help me find out if it's something I'm doing or if my current birds are just fickle. Plus, more chicken poop!

Last year's sweet corn patch was in ground that had never been planted into anything but grass. Surprisingly, I didn't have much trouble controlling the grass in that patch with some hand weeding and a hoe, but HOLY MOLY CATNIP! I'm not sure how, but the amount of catnip that grew over the summer was kind of astounding. Mostly for other reasons, though, that area will be included in a chicken paddock, including a new mobile coop I'm building out of an old trailer frame. That will allow me to move them around throughout the year, especially bringing them closer to the house next winter where water and electricity are easier to access.

More coming in part two of this, later this winter...

Wednesday, August 28, 2013

Accidental squash hybrid

I like to save seed. There's just so many reasons to save the seed from what we grow, reasons I'll go into in another post someday soon.

But sometimes, you don't get what you thought you were going to get.

Last year, I planted my butternut squash about 50 feet from my pumpkins, separated by a patch of watermelons and cantaloupe, which should have been enough to prevent cross pollination. So last fall, I picked a couple of the best looking squash from the best looking plant, and kept a couple envelopes of seed. I keep the seed from each fruit separate, so that I can tell which ones grow the best. By chance, I was given a few packets of butternut squash seed to try and I planted those in my main squash patch and I planted my saved seed in a second, smaller patch. I was a little surprised when the second patch plants grew long vines instead of the shorter vines and bushy form that my butternuts usually have. I was even more curious when they didn't set fruit when my other squash did. But gardening season is busy and I didn't think too much of it until one day a few weeks ago, I went to take a closer look at the plants and found very small, approximately 5 inch pumpkins growing on the plants.

What?

The only thing I can assume is that one of the pumpkin vines grew very long, as mine did last year. There were some vines that grew upwards of 50 feet, grew up a lilac bush, and then produced a 10 pound pumpkin 7 feet off the ground, hanging from that lilac bush. If a pumpkin vine grew close to the squash, I suppose it could have cross pollinated, and then just by chance I saved seed from that particular squash.

So I started doing some research on the subject, and lo and behold, butternut squash can hybridize with some species of pumpkins. Interspecific hybrids are rare, but this just happens to be one that can happen. The Latin name of butternut squash is Cucurbita moschata. The Latin name of most varieties of orange pumpkin is Cucurbita pepo. In my research, I found a paper published by Purdue University stating that those two species can hybridize.

Neat!

My mini-pumpkins are not very productive. Out of approximately 20 plants they have only produced about 8 fruit. They grow very quickly to about 5 inches across, and then start to turn orange. I don't imagine that soil fertility is the reason for their small size, as they were planted in an old chicken run, complete with a whole summer worth of chicken poop. However, the neat factor of this even though it's not what I was hoping to grow, is very high. The vines are still setting fruit, so maybe I'll end up with some number of cute little pumpkins out of it.


Another interesting thing about this is that this small patch of hybrid squash/pumpkins is a LONG distance from any other Cucurbita species of plants. Somewhere in the vicinity of 200 feet. That means that these plants have most likely self pollinated to produce the fruit that they have set. That means that they are not sterile and if I save and plant seed from them, I might get yet another interesting result. Or, the seed could be sterile and I'll get nothing. Either way, I love to tinker so this is pretty cool to me.

Another point worth mentioning is that hybrids of those two species can be crossed back with one of the parent species. This hybrid is of butternut squash and a small-medium sized pumpkin similar to a Jack-O-Lantern cultivar. I did not plant all of the seed from that batch, so next summer I'll plant some of them strategically in an isolated Connecticut Field pumpkin test patch, and some more in an isolated butternut squash patch, and see what I get out of those crosses. I might get a better tasting, very large pumpkin. Or I might get some other weirdness. Or I may get nothing. But, there's something pretty neat about possibly developing my own variety of pumpkin, squash, or whatever the end result might be.

I am very curious to hear from anyone who has experience with this situation, as I would like to learn more about how to properly manage the future experiments with this seed.


Thursday, July 25, 2013

Tis the season for composting

Composting is great. Right? Yeah! Really. We know this, so I'm not going to go into why. What I am going to talk about is how, usually, composting is a great thing that you can't (or don't) get enough of.

So you pile up your garden and kitchen scraps all spring and summer. You pull weeds and add those to the pile. Maybe you even dump some lawn clippings in there. All spring and summer you have this beautiful pile of material just composting away, home to millions if not billions of perfectly happy thermophilic bacteria doing their happy little thing.

Come spring, you go to add that beautiful compost to your garden and realize that you should really have about 5 times as much as you have. At least that's how it always works for me. No matter how hard I tried last year, I don't have enough compost this year. Personally, I choose to use no commercial external inputs (stuff I bought to improve something) to my garden. In fact, the only purchased external input to any of my food production is the occasional bag of chicken feed, especially during winter. This means no fertilizers, organic or otherwise. My only sources of fertilizer for my gardens are compost and chicken poop. I acknowledge that the chicken poop is at least partly external, but that's a work in progress as well. It takes a LOT of finished compost to properly amend 1500 sq feet of garden, and that's if I ignore the sweet corn patch, potato patch, and pumpkin patch. The way I calculate it, a pile of finished compost 4 feet high and 4 feet square is enough to put 1 inch of finished compost on about 800 sq feet of garden. That's only about half of what I'm going to need at a minimum, come spring. Maybe less. So my goal is two finished compost piles 4 feet cubed by spring, and this is how I'm trying to help get there.

My beautiful daughter picking clover flowers. We mow and rake this stuff up for the compost bin.


Compost everything but the kitchen sink. Almost. Newspapers, junk mail (no plastic or glossy papers though), eggshells and all food scraps that don't have meat or oil in them. Tissues and paper towels used for wiping hands, etc. Leaves, grass, weeds, sawdust, and straw. Think about how much of this stuff you might throw away in a year and put it in your compost pile. Cardboard should be torn up or shredded first. I rip up paper too.

Don't waste lawn clippings. If you have a lawn, especially this time of year, it's tempting to just blow the clippings back down and let them mulch. They're usually short as the summers dry out the ground and the grass doesn't grow as much. If you can, let the grass grow a little longer and then bag or rake it up for the compost pile.

Do you have some space that you didn't plant this year? Seed it with yellow or white clover and grow compost. Really tall clover plants get a woody stem and don't compost as easily, so if you plant clover you should compost just before it flowers. The stems are still not too tough and it's at its nitrogen fixing peak. Pulling the roots up with the plant will move those nitrogen fixing nodules into your compost bin.

If you live in the country you probably have an area that you just let grow into tall grass. I mow this down, rake it up and put that in the compost bin too. This works great if you find yourself adding a lot of greens and not enough browns to the pile. Mow it down and let it dry in the sun for a few days before adding it to the pile.

Do you have chickens in a tractor or on pasture? They scratch grass all to heck, and always leave a layer of dead grass laying where they've been, especially if that grass was a bit long. I rake this up and put it in the pile. This stuff is great, it's dried and coated in chicken poop. That's about as good as compost gets.

Do you have bedding that you use for pets or livestock? I switched from using pine shavings to straw and grass bales for chicken bedding in the winter, because it composts faster than wood shavings.

If you plant cover crops, you can choose to work those into the ground where they are, or they can be chopped and added to the compost pile so you can choose where you need their nutrients later on.

If you burn natural charcoal or wood in your grill, some ashes mixed in are beneficial as well. The drawback to this is that wood ash will make your compost and your soil quite alkaline. Use wood ash only in small amounts, or offset with ingredients that will acidify the pile such as oak leaves, pine needles, or other material that is very high in tannins or acids. Of course, if you have exceedingly acid soil this is an easy way to solve that problem.

At a certain point, everything starts to look like potential compost. Some more extreme ideas:

Occasionally I walk down the ditches on the old dirt road with a machete and cut clover, pigweed, mare's tail, wild sunflowers, and other large plants. Stuff that's big enough that you can bind the stems with a string and carry them over your shoulder. I can add 10 pounds of high nutrient compost to my pile on an evening walk this way. Plus it's great exercise. You'll want to make sure that anything you cut from a road ditch hasn't been sprayed, but if you're familiar with the area, you'll probably know that already.

This time of year, my shore fishing trips end up with me dragging a lot of coontail and other aquatic weeds back to shore. Throw it in a bucket and put it in the pile too. If I had more time, I'd actually gather the stuff just for this purpose. Pay attention to where you're collecting this stuff from, though. Chemical contamination is always a concern.

With doing these things, I currently have a compost pile 4 feet high and 4 feet wide both directions, in a chicken fence bin. It's still not enough.

The next key is making sure your compost finishes as fast as possible. A full bin makes it hard to add more. Plus, if your compost bin is breaking down fast and the pile is shrinking down into finished compost, you'll be more likely to add more to it. Add a little soil from a healthy garden bed to introduce beneficial bacteria to the pile. Large compost piles are a miserable chore to turn. That usually means they don't get turned often enough. A second bin that you can move the compost back and forth between makes this much easier. Pay close attention to the moisture in the pile. large piles will hold moisture in the bottom for weeks after the top half dries out. Turning solves this problem usually, but watering the top of the pile lightly, so that only the top half gets damp, will help between turnings.

Another thing to keep in mind here is quality of compost. A compost pile composed of nothing more than grass clippings isn't going to create the quality of compost that a more varied pile will. You may end up with plenty of nitrogen, but you're risking micronutrient deficiency. The more different things you put in there, the better the compost you'll make. Also consider taking a lesson from the permaculture crowd and supplementing your compost with urine. Gross? Maybe, but urine from a healthy person who doesn't take any pharmaceutical drugs (or illegal drugs, obviously) is a fantastic fertilizer. There are studies showing that fertilizing tomato plants with diluted human urine can increase yields significantly, somewhere in the area of 50% or more. Guys, peeing on your compost pile not only adds nutrients that that the beneficial bacteria in the pile use, it also adds nutrients to the finished compost. Ladies have found various solutions to help with this process as well.

I think, oftentimes, composting is looked at as a method to dispose of scraps, and that's all. However, by investing a little more time and attention in composting, you will also create the perfect soil conditioner for your garden, fertilizing and improving soil tilth at once. And it doesn't have to cost you a dime.

Tuesday, July 9, 2013

Chick Basics

It seems that over the last few years, chicken keeping has become more popular, especially in rural areas. Farm yards that previously had only a shaggy dog or two now seem to often have a small flock of chickens, or as in the case of my (almost) neighbors, turkeys, guinea fowl and peacocks. This really isn't surprising, considering increased awareness of food quality and safety as well as a general consensus that the quality of the food we buy in stores just isn't what it should be. Compared to other methods of raising your own food, a few chickens is actually a pretty low maintenance setup, once established. It's a great way to provide eggs and meat for a family concerned with what's in the chicken products they're getting at the grocery store.

Chickens are for anyone who has the appropriate space and time to dedicate to them, and the desire to make some interesting friends that will help turn kitchen scraps and some grain into eggs for breakfast. That's pretty much what chickens do. They turn stuff you can't eat into stuff you can. If you cook a lot of meals at home and tend to have a lot of leftover vegetables, bread, grain products etc, chickens will happily convert all of that into eggs for your next breakfast. Add in a bit of commercial chicken feed and/or some scratch grains, and six laying hens will provide you with 10-12 dozen eggs a month during the summer. Even if you fed them entirely commercial feed for that month, they would probably eat less than 50 pounds, which costs about $16. That comes out to about $1.50 a dozen for farm fresh eggs. Try finding that deal in you grocery store. Plus, it takes only about a half hour every other day to tend to them, once you have them established in a quality coop with a proper run.

Most people have their first interaction with chickens in the spring, when the farm supply stores carry chicks. Spring and summer are the best times to bring new chicks home. In fact, if you live someplace where the winters get cold, spring or early-mid summer is about the only time to start. If you're looking at layers, they need to grow and feather out well before it gets cold, and raising meat birds in winter would be an exercise in frustration (where I live at least) without a well heated building. Young chicks can not tolerate cold drafts, and even juvenile birds would have a difficult time in an unheated coop on a night where the temps dip to around -30F as they do sometimes here. The best bet is to obtain layer chicks in the spring or early summer so they can grow strong before winter comes, and to raise and butcher meat birds during the summer. Of course, if you have warm weather all year, this doesn't apply.

So I ran out and bought two layer chicks! Now what?

As it is all too often, purchasing chickens can be an impulse buy. You're walking through your farm supply store in April and there they all are, hopping around and peeping your (or your daughter's) name. They're so cute! Mom/Dad, can we get one please? No wait, we better get two (or twelve!) so they don't get lonely. It's almost impossible to say no, especially if you've ever thought about trying your hand at chickens. It's the perfect excuse, isn't it?

Hopefully you put some thought into the actual keeping part before you left the store. Some places sell a chick starter kit that has a small feeder, some feed and a waterer. If you didn't, that's no reason to panic either.

First off, chicks need shelter of some kind. Most chicks you see at a store or that you order are 1-3 days old. They have only light fluff feathers and almost no body mass to retain heat. That pretty much means that one icy breath from my ex-mother-in-law could kill them. They are very delicate little critters. At this stage, shelter can be quite a few things. Depending on how many you have, a box with some sawdust or straw in the bottom might do it. For my purposes, I have box made from scrap wood that I set out on the floor of the barn when I bring home new chicks. This brooder is made from scrap wood, and is just a box without a bottom. It's about six feet square and about 18 inches high. This will keep the chicks enclosed and keep any drafts off them until they're about 3 weeks old as long as I don't overcrowd it. Some kind of supplemental heat is almost always necessary, unless you have an 80 degree room to keep the brooder in. Most commonly, a heat lamp is used. Start the lamp out about a foot above the chickens' heads, and raise the lamp a few inches every few days, as they grow feathers and need less and less supplemental heat. Make sure there is an area where they can get away from the heat as well, in case they want to cool off a bit. You can tell if they're cold or warm by how close they huddle to the lamp, or how far away from it they wander.


In a pinch, a small bowl of water and a cat or dog food dish full of chick starter will do the trick. One thing to be cautious of is that a chick can and will drown in a bowl of water. If you have 10 chicks running around in a brooder, it's actually quite likely that one will fall into the water. Even if it doesn't drown, the chill from being wet could mean death if it doesn't find its way to some warmth. A chicken waterer is ideal. It holds plenty of water for a few days and they can't fall into it. One trick to help keep chicks or chickens from kicking their water full of sawdust, straw and poop is to elevate the waterer slightly. In my winter coop, my heated waterer sits on top of an old tire rim laid on its side. This keeps the water much cleaner. In the brooder, I just set it on a chunk of 2x6 from the scrap pile. An old phonebook would probably do it too.

What to feed is a pretty simple question with a lot of potential answers.The simplest answer for a first time chicken keeper is to buy commercial feed. I recommend a quality commercial chick starter for the first 4-6 weeks for layers. There are several good varieties, personally I use Purina when I buy any kind of feed, but I have used others as well. Medicated or non-medicated is a question worth putting a little thought into. Personally, I don't agree with giving medicated feed. I treat animals for illnesses they have, not for what they might get, but that's a decision you will make based on your own plans and ideals. After that period, switch to either a flock raiser feed containing about 18% protein, or a layer mix containing about 15-16% protein. The protein is critical for egg formation when the chickens reach laying age. Too little protein will mean either low or no egg production.

Once you're set up with shelter, food, and water, the next step is to get into the routine. I change water in bowls daily, even if it looks clean. If you're using a bucket with nipples or some other sealed watering method, you can obviously go longer as the water can't be easily contaminated by the birds. Bedding should be changed whenever it is visibly soiled, or there is a smell of ammonia or any other nasty smells. Pine shavings are good for young chicks, as you can pile it up a few inches deep, and it won't need to be changed as often. Straw works too, but it absorbs less. Feed should be available at all times for such young birds. A ready supply of food and water helps them stay warm and healthy.

So, to summarize, the basic principles for new chicks are:

Give them adequate shelter
Keep them warm
Give them quality food
Always provide clean water
Keep them out of their own waste
Make sure they have enough space to move around

It's really that simple. This will get you through the first few weeks, giving you plenty of time to think about things like building chicken coops, paddock shift designs, and natural feed mixtures.  :)


Thursday, June 6, 2013

Grow your own chicken feed?

Growing my own chicken feed for winter, because I'm a tightwad and don't like to spend money!

note, part 2 is available here: http://backyardbiointensive.blogspot.com/2014/04/grow-your-own-chicken-feed-part-2.html


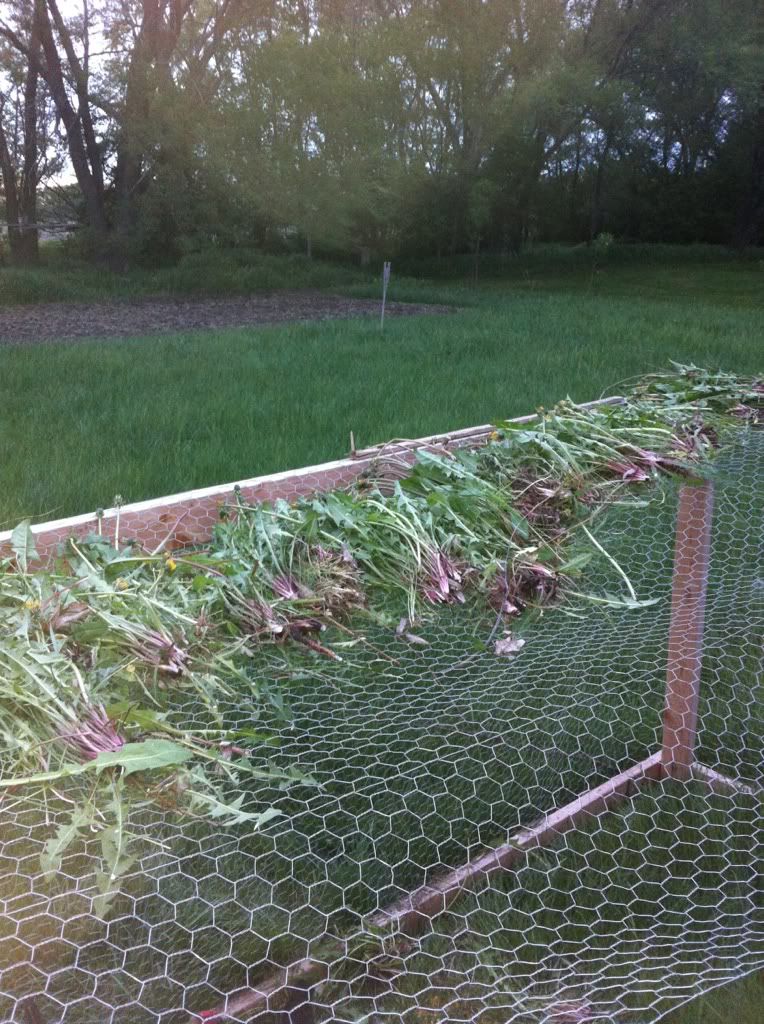
Drying dandelions on the chicken tractor.


Chickens are a key piece of my self-sufficiency model. They provide food, fertilizer for the garden, and I will use them next spring to clear and till ground for a new garden. They dispose of scrap food and help keep grasshoppers in check. Feeding them during the summer is pretty easy. Even if there isn't enough food in a chicken's paddock, run or tractor, there are dandelion, clover, alfalfa, berries and other things they love to eat growing just about everywhere. As of now, I've got my layers in an 8 foot by 8 foot tractor which is moved every day. They graze on the dandelions, grass and other plants, and dig for bugs and worms. In the tractor is also a hanging maggot feeder that provides necessary protein for laying eggs. The chickens also get fish scraps when we fillet walleyes, they get kitchen scraps, and once a day I chop down whatever other good stuff I find growing while I'm picking wild asparagus or just driving home from work. This combination allows me to reduce the "purchased" feed to about 1/4 pound per day for all 6 chickens. That "purchased" feed is a mix of corn and black oil sunflower seed. I feed about a handful of this once a day, that's all.

Storing enough feed for winter is a different story. Because chickens are so important to me, I want them to be in the best health and produce the best eggs that they can. To me, this means not feeding commercial chicken pellets, or other commercial feeds. As I said, feeding them in the summer is easy, there's food everywhere. But how to provide a diverse, balanced, proper diet for them in the winter?

One method would simply be to go to your local feed store and have them mix up a batch of high quality organic grains and nutrient supplement. As far as the health of the chickens goes, this would be a great diet for them. It's also expensive. One of my goals is to have everything that I grow be a net contributor to our diet or finances. If I spend more to feed my chickens than it would cost me to buy fresh, free range organic farm eggs, then my chickens are not a net contributor. I'll even take it a step further and say that I want them to cost me nothing. And, I think it's possible. I'm not going to address paddock shift designs or free ranging or anything related to summer feeding. Here, I'm only going to talk about how to store enough high quality, free or nearly free feed to get your chickens through the winter. Oh, and did I mention this is my first year attempting this?

What to grow?

So, first things first, we should have a list of things that we know chickens like to eat. This is a list I copied from somewhere and pasted into my chicken notes file. I can't remember where it came from, so I can't give credit for it, but thank you whoever you are.


alfalfa
american persimmon 

apple
apricot
barley
black locust??
blackberry
borage
brassicas
buckwheat, grain
caragana sp.
cherries
clover
comfrey
corn
dandelion
day lily
elaeagnus
elderberry, blue
forage pea
hairy vetch
hickory nuts
hulless oats
lamb's quarters
lentils
medic
millet
milo
moringa
mulberry 

nettle
oaks (acorns)
oats
oilseed radish
pasture grass
peanuts
plum
purslane
quinoa
raspberry
rice
sea buckthorn
sesame
siberian pea shrub
strawberry
sunflower
wheat
xanothocarns sorbifolia 


I've included the entire list because even though some things aren't options for me, they may be later on, or for someone else. The next step is to reduce that list to the things that I can realistically grow and store before winter. That means removing the trees and slow growing perennials that wouldn't be ready to become forage before the snow flies. Unfortunately this means we're going to be including mostly short lived annuals, but that doesn't mean we can't plant those other fantastic chicken forage plants like mulberries, they just aren't of use to me in the short term.


alfalfa
barley
blackberry
brassicas
buckwheat grain
clover
corn
dandelion
hairy vetch
lamb's quarters
lentils
millet
milo
nettle
grass
quinoa
raspberry
sufflower
wheat

I have included blackberry and raspberry because even if they do not produce berries, their foliage is a quality chicken feed. Plus, I already have both growing. Realistically, I don't need to grow everything on that list in order to provide a quality winter feed mix for my chickens. I'm going to just arbitrarily say that I need to have 3 kinds of grain/seed feeds, and 3 kinds of green/hay type feeds, at a minimum. So, the things I already have growing are a good place to start.

alfalfa
clover
blackberry
raspberry
dandelion
corn
nettle
grass
sunflower

There is a large amount of alfalfa and clover that grows in ditches near my house. All I have to do is walk a half mile with a machete in hand and I can fill my arms with both of those.

Blackberry and raspberry will make good additions to the hay mix. Realistically I can't cut/pick enough for it to be a main part of the mix, but it will provide nice variety for my birds.

I have dandelions all over the place. Nice big ones with nice roots. Periodically I grab an armful and lay it out to dry, I expect this to be a large part of the feed mix for this winter.

I have a decent sized sweet corn patch, and the birds get any ears that can't be eaten or sold already, but this year I will put a small stack of ears away to dry and feed over the winter. I have also started a patch of yellow dent corn that I will dry and store for winter feed.

Nettles grow in ditches and fenclines all over the place. I am told that after they are dried that they no longer sting. I'm going to dry some out over the summer and test this on myself before feeding them to the chickens. If this works, nettles would be a great addition to the feed mix for winter. They grow large and fast and are loaded with vitamins and minerals.

Grass is something I'm not sure about. My birds love the tall fescue that grows in my lawn (or what was a lawn before I decided to stop mowing it and let it become a grass jungle) and eat it happily, however I'm not sure that there is any value to storing it for feed. Grass provides very little nutrition even when it's green and fresh, it seems that there may just be no point in storing grass. The one notable exception to this would be if it has gone to seed and has intact seed heads.

Sunflower is a great feed crop. I've planted sunflowers in all kinds of places around the place, and will pick the heads and dry them for feed when they're ready

There are two other crops that I haven't yet mentioned, but that are great chicken feed and chickens love eating them.

Pumpkins
Squash

I didn't include those in the main list because they can't really be dried out and stored for winter (except the seeds). However, they are such good feed and provide so much volume of feed, I will be storing both in my root cellar for the winter, and feeding them to the chickens for as long as they last. Ideally, small pumpkins and squash would be better than large ones, so that they birds can eat them up before they freeze in the coop. That's perfect, because the small ones aren't much good for carving or selling anyway. I've fed both to my chickens pretty much since I brought them home. I just lay the pumpkin or squash on the grown, chop it into thirds with a machete, and toss it in. They gobble up the seeds first, but they eat the pulp too.


So, how much of all this am I going to need?

Well, I've discovered that when it comes to commercial feeds, most chickens eat about 1/4 to 1/2 pound of feed per bird per day, during the winter. So if I cheat high and store enough to feed 1/2 pound of food per bird per day from November 1 until April 1, that should be a pretty good start on things, as far as arbitrary guesses go.

So, figure 5 months times 30 days, 150 days. Times 1/2 pound per day for a bird equals 75 pounds per bird. Times 6, 550 pounds of feed. That's commercial feed which they eat 100% of. There is waste in this like pumpkin skins/stems, alfalfa/clover stems, etc. Let's use it as a starting point anyway, since we already rounded up to 1/2 pound per bird per day.

Yikes.

So about half of that by weight will be grains and half will be hay/dried greens. 275 pounds of dried hay is going to take up some space. I better clean out an area for that this weekend. 275 pounds of grains, that doesn't seem so bad. Between sweet corn, field corn and sunflowers, that should be doable. I'm also not sure where pumpkins and squash fit in that equation either. Let's adjust numbers a little bit.

200 pounds of grain
200 pounds of hay/dried greens
100 pounds of pumpkins/squash
Whatever kitchen scraps are available
garden scraps

Conclusion?

That seems a little more possible. And, if at the end of winter I run out, I can always buy a bag of feed. It's not like my chickens will starve if I guess wrong. I'm learning here, after all.


I guess I better get busy picking and drying some dandelions, clover, and alfalfa. And, as always, I welcome your input. This plan is a work in progress, I'm sure I'll make many adjustments before winter comes.


Related: http://medicinegardens.blogspot.com/2013/07/update-mandan-bride-flour-corn.html


Thursday, May 30, 2013

No Chemicals Please!

Sometimes, in my quest to do things what I see as the "right" way, I hit little bumps. Sometimes we may just need a reminder why it's not ok to go squirt a little roundup on that stubborn thistle that wants to grow in our carrot patch. It's easy to have good intentions, it's a bit harder to actually follow through.

So, in order to help remind myself, and my family, and anyone else who might read this, I've assembled a list of the most common farm chemicals and their negative effects. This may seem a bit like I'm focusing on the negatives here, but in my view, there really are no positives to using these chemicals. Whatever short term gain they are designed for is far outweighed by the long term loss.


Let's start with the top 5 most used herbicides and pesticides in the USA.


Glyphosphate/Roundup
   -disrupts/reduces production of human sex hormones
   -kills tadpoles
   -causes genetic damage to human and animal cells
   -laboratory confirmed link between exposure to Glyphosphate and cancer, ADD, miscarriage
   -causes genetic damage and immune dysfunction in fish
   -causes genetic damage and abnormal development in frogs

 Atrazine
   -contaminates lakes, rivers, streams and groundwater easily
   -skin, eye irritant
   -severely disrupts reproduction in amphibians and other animals even in very low doses <0.1ppb

2,4D
   -acid and salt formulations cause blindness on contact with eyes
   -linked to Lou Gherig's disease
   -causes ataxia, miscarriage in rabbits
   -causes weight loss, nerological issues in dogs
   -causes retinal degeneration in rats

Dicamba
   -Respiratory, skin, eye irritatant
   -highly soluble in water, groundwater contaminant

 Trifluralin
   -eye irritant
   -possible carcinogen
   -likely disrupts endocrine function


Soil fumigants, possibly the most toxic chemicals used in industrial agriculture

Methyl Iodide
   -if inhaled, causes  ataxia, cough, diarrhoea, dizziness, drowsiness, nausea, sore throat and vomiting
   -Highly toxic to most animals
   -known carcinogen
   -potential ground water contaminant
   -neurotoxic
   -causes miscarriage


Metam Sodium
   -highly toxic
   -known carcinogen


 Chloropicrin
   -highly toxic poison gas


How about a few others, maybe the common household ones?

Diazinon
   -residential use outlawed in 2004
   -symptoms in people include abnormal blood pressure, abnormal heart rate, breathing difficulty, chest pain, anxiety, convulsions, dizziness, coma, tremor, twitching, abdominal cramps, vomiting

Carbaryl (Sevin)
   -can cause nerve damage with long term exposure to high doses
   -can leech into streams and lakes and kill beneficial aquatic insects


I could type all day long about this. Really. The list of chemicals one might encounter on a farm or even a garden is staggering. If you're wondering, these are the "common" ones listed here.

http://wssa.net/wp-content/uploads/wssp-09-01-01_4_back_124_132.pdf

Yeah, four pages of names, and that's just the "common" ones. And that doesn't include fungicides, insecticides, etc. I don't want to eat that stuff, do you?

A couple weeks ago, I started a batch of dandelion wine. I just went out and picked flowers. I can do this because I know that there have been no chemicals on my property in years. Of course my neighbors down the road complain about all the flowers, they blame their dandelion problem on me. I tell them that it's not a problem to have a pretty, edible plant that requires zero care growing everywhere. They just shake their head and go back to spraying 2,4D all over the place, while their grandson plays in the yard.

Yesterday a neighbor told me that they can't grow anything without chemical fertilizer and herbicides. I tell them that's not true, they can actually grow more, but they're going to have to get their hands dirty. Change tactics, think differently. This is usually met with a blank stare and the feeling that the person I'm talking to thinks I'm wacky. There are better ways than spraying everything full of poison. There are pioneers in this area named Sepp Holzer, Joel Salatin, Paul Wheaton and many many many others, all of whom have succeeded at growing food and animals without synthetic chemicals. There have been stacks of books a mile high written on the subject. There are hundreds if not thousands of websites like Permies.com that are loaded with information. Can't grow anything without chemicals? That's ridiculous. Maybe they believe me, maybe they don't, but it would be a shame if they or their family got sick because someone was too lazy to weed the tomatoes.


This is not a scientific publication, but here's some references anyway.

http://www.epa.gov/caddis/ssr_herb_int.html
http://www.motherearthnews.com/organic-gardening/hazards-of-the-worlds-most-common-herbicide.aspx#axzz2Un4Q9DMO
http://www.epa.gov/oppsrrd1/REDs/factsheets/24d_fs.htm
http://www.pesticideinfo.org/Detail_Chemical.jsp?Rec_Id=PC32871
http://www.panna.org/resources/specific-pesticides/fumigants
http://www.pesticideinfo.org/Detail_Chemical.jsp?Rec_Id=PC38191
http://www.pesticideinfo.org/Detail_Chemical.jsp?Rec_Id=PC32859
http://www.pesticideinfo.org/Detail_Chemical.jsp?Rec_Id=PC35061
http://en.wikipedia.org/wiki/Diazinon

Wednesday, May 29, 2013

Garden status update

Considering that it's the end of May, all of my gardens are way behind what I expected at this point. The weather has been very uncooperative. Crops that were planted early either did not germinate, or took so long to germinate that there was no point in planting early. Cabbage, broccoli, brussels sprouts, peas, and onions were all planted on May 1st and 2nd. Onions are finally now coming up, 27 days later. Peas came up quickly, but growth has been very slow due to very little sun. The ground is waterlogged thanks to cool temps and 1/2 inch of rain every other day on average.

But, I can finally say that everything is planted, even if some of it still hasn't come up.

Roll call for the main garden, the one I converted to raised beds in April.

Snap peas
carrots (3 different varieties)
beets
radishes
Spinach
Various types of leaf lettuce
Romain lettuce
Cabbage (two varieties)
Broccoli
Brussels sprouts
Eggplant
Anaheim pepper
Green Bell pepper
Orange Bell pepper
Chocolate Bell pepper
Jalapeno pepper
Ancho chile pepper
An unnamed heirloom red bell that I got from a friend of my Mom's
Dr. Walter tomato
Brandywine tomato
Marglobe tomato
Amish Paste tomato
unnamed cherry tomato
Zucchini
Cucumber
Three varieties of onions from seed
One red onion from transplants started indoors about a month earlier
A generic white onion from sets
A generic red onion from sets
Radiccio
Celery
Contender green bean


That garden totals about 600 sq feet, after it was all said and done.  It's planted very densely, but I carefully spaced every seed just where I wanted the plants, so I will have to do zero thinning. Any seeds that didn't germinate are replaced. This guarantees that I'll have a staggered harvest of most crops. Not intentionally, but I don't see it as a bad thing either. As soon as the plants are visible above ground, I start mulching with grass clippings from the lawn. As the plants get taller, I build up the mulch. This guarantees that I'll do little or no weeding and water way less than I would otherwise as the mulch holds moisture in the ground. The grass clippings also add nice organic matter to the soil as it breaks down and is hand tilled into the garden in the fall. Just make sure that your grass clippings come from a lawn that hasn't been sprayed with any chemicals. I stopped using chemicals years ago, now I just pick the dandelions and clover and feed it to the chickens. It's a much better use of those nutrients.

Other than that garden, there is a sweet corn patch planted in a freshly tilled garden. I can't use it for much of anything else until the 2nd year because of all the grass that will germinate in it, so it's a good place for that. That garden is about 1000 sq feet, but only about 700 of that is in corn. The rest is planted in a large growing variety of pumpkin.

The third and largest garden is a bit of a family garden. Last I measured it, it was about 6,000 square feet. My father grows sweet corn in about 1/3 of it. A portion is set aside for tomatoes for his house, and the rest I plant into pumpkins, squash, canteloupe, and several varieties of watermelon. Overall, I planted about 2,500 sq feet into those crops. This garden is by far the most work, because it's too large to mulch. We do use a garden tractor to cultivate it until the vines get too long. After that, I chop and drop weeds before they go to seed, and if necessary I get out the machete and a well sharpened hoe to take care of the big stuff. It will end up with more weeds that I'd ever tolerate elsewhere, but there's only so much that can be done about that, and most of the big weeds are dynamic accumulators anyway so they're good for the soil because they grow deep taproots and draw nutrients up from the subsoil.

Last, but not least, is 1/3 of an acre of several varieties of potatoes. Good Friday? Not a chance. More like May 10th. The ground was way too wet to get into before that. There was actually still snow on that ground until May 1 about. These are planted with an antique John Deere tractor pulling a 90 year old potato planter, and harvested with the same tractor and an antique potato digger. This harvest is split up amongst the family, and if there's any left after that 2000 pounds or so is handed out, the rest will be sold at the farmer's market. I primarily plant Yukon Gold, Kennebec, and Norland Red potatoes.

This ended up being a pretty long and sort of pointless entry, I realize now. However, one of my purposes with this blog is to document for my own purposes. If it's of any use to anyone else, that much the better.

Happy Gardening!


Tuesday, May 28, 2013

Homemade chunk charcoal - a documentation of failure

On a completely unexpected whim, I decided to attempt to make chunk charcoal. Now, I did some research on this before hand. Not much though, as I've seen this done using roughly this method. I want to preface this entire post by saying that this was by all accounts a failure, but I felt it worth documenting, as I find I learn as much from failures as I do from successes.

My basic plan was to fill a steel drum with small chunks of wood, place it above a hot fire and then close it up leaving only minimal venting to prevent a bad bad case of explosion.The idea is that the heat will vaporize off all the volatile gasses and leave only solid carbon behind. That's the plan anyway. It can work, I just got sloppy.

So, step one is to cut up a bunch of wood. Check.
Step two, fill the barrel. Check.
Step three, build a nice hot fire, Check.

This is where the pictures come in.


This is immediately after setting the barrel on the fire. I let it get good and hot to dry out the wood in the barrel. Very little smoke, mostly steam came out of the barrel for the first 20 minutes. When I started seeing actual smoke coming out, I closed up the lid.

The lid on this barrel is just a square cut out and hinged with some tie wire. I set that closed, laid tinfoil over the top to cover the gaps in the lid, and then piled it full of dirt on top to act as weight. This closed the top up nicely, with only two vent holes.


I let this cook for about 3 hours and then took a peek. There was essentially no change to the wood inside, even though it was venting air at about 300 degrees. I decided that it just needed to either be hotter, or cook longer to remove any remaining moisture. I could feel the smoke still had a lot of steam in it, which is what led me to try the second option.


I rebuilt the fire with about enough to burn for an hour or so, and then went in the house. When I checked it before bedtime, the fire was burned almost all the way down and the top of the barrel was cooling. I figured that it was probably undercooked, but didn't want to overdo it so I left it to finish burning down as it was mostly just loose cool coals at this point.

The next day, much to my surprise, the barrel was full of ash.Completely burned down.

So, what I learned from this:
The wood has to be DRY DRY DRY.
Temperature control is difficult at best
Duration is hard to judge unless your barrel has a window.

There are other methods to make charcoal, but this one is easy for me so I'm going to try it again.

Things I'm going to do differently.

I'll use only wood that has dried in the sun for several weeks. Any wood that is recently felled or green will be saved for a later batch.
I'll pay more attention to the heat of the fire, I'm sure it got too hot towards the end when the moisture had steamed off.
I'll use a lid that allows me to check the state of the charcoal more easily, so that I can monitor more closely.
Less heat
Less time

And hopefully, I'll have something that more closely resembles charcoal than ash.

Any and all constructive input is welcome, especially if you've made charcoal before.

Monday, May 27, 2013

Thought I'd make a quick post to update on the dandelion wine. The day after pitching yeast and closing it up, it started fermentation. It's now been a week, and it's been bubbling nicely since then. It's not the nearly violent fermentation that I've seen with fruit wines but it's steady and looks to be coming along nicely. I'm hoping to have a glass after I get done digging potatoes this fall.  :D

Tuesday, May 21, 2013

Dandelion Wine

Ever since I first became interested in making wine, I've been curious about unique homemade wines. My first batch was wild plum wine and it was delicious, although it didn't keep very well and started to degrade in quality about the time the last bottle was used up at about a year of age. After a few other attempts at non-standard (not grape) wines (mead, blueberry, apple) were less than a great success (the apple was drinkable but not great, the mead tasted like nail polish remover and still does 3 years later, and and the blueberry got contaminated by wild yeast), I kind of put the idea on hold. I mean, I like making wine, but it's a time consuming process and there just wasn't the time to commit to it.

But, somewhere early in my first winemaking adventures, I learned about dandelion wine. What an idea, wine made from flower petals. And not just any flower petals, the most available flower petals I could imagine. I'll admit, the idea of plucking the flower petals put me off for a long time, but this past weekend after seeing all the dandelions blooming in the yard, I figured it was time to take a stab at it.

All of my previous batches of wine were five gallon batches. I have a six gallon primary and a five gallon carboy, but gathering the petals for a batch that size would have literally taken all day. After hunting around the house I came across a one gallon glass jar that my mom brought for making kraut, and a 3 liter plastic bottle that had spring water in it. I don't really like the idea of using plastic, but it's the only thing I could have fit an airlock to easily.

It took me about 45 minutes to pick what looked like about a gallon of dandelion flowers without stalks. Just pick the flower head and remove any flower stalk that comes with it. Sarah and I sat down at the kitchen table and started plucking petals. There may be easier ways to do this, but the method I settled on after some trial and error was to squeeze the flower between my thumb and index finger right at the base of it and roll it. This caused the base of the flower head to tear and kind of unroll, allowing me to pull most or all of the petals away with my other hand. I warn you, this took us over an hour to do a gallon of flower heads and I ended up with stiff hands afterwards.


This gallon of flower heads yielded about 2.5 quarts of petals. I left about 1/2 cup of the flowers whole, as some recipes I've read suggest that this adds some desirable flavor to the wine, at the expense of taking longer to age. The greens of the flower head are bitter if too much is used, so my research suggests they should be used sparingly.

The recipe I worked up was based on several I found on scattered about the internet, and formulated for 1 gallon of wine. My makeshift secondary fermenter is only 3 liters, so I did a little math and adjusted for this. I'll post the entire recipe at the bottom of this entry. An interesting tidbit about dandelion wine is that it does not have a lot of body on its own, and one suggestion I found to remedy this was to add rhubarb to the mix. I just happened to have a quart of frozen rhubarb in the freezer, the last of last fall's harvest, so that was my solution. so I lightly mashed that in a bowl and strained the juice into the primary. The mashed rhubarb

While Sarah stuffed all the petals and the 1/2 cup of intact heads into a nylon stocking with some marbles in it for weight (otherwise it'll float in the primary, you need at least 10 sterile glass marbles), I scrubbed the glass jar and crushed up a campden tablet to rinse it and my other tools with, and started that process. After everything was clean, I lightly mashed the rhubarb in a bowl and strained the juice into the primary. The mashed rhubarb was added to the nylon full of dandelion petals and the whole thing was tied shut and put into the primary. I boiled slightly more than 3 liters of water and poured this over the nylon and into the jar. It instantly took on a pretty yellow-green color. This was covered and allowed to cool overnight.


The next day, I squeezed the juice out of the petals and rhubarb in the nylon, poured the liquid back into a kettle, heated it to just shy of a boil. I stirred in two pounds of sugar, a little bit of lemon zest, and the juice from one large lemon. The lemon is to adjust the PH down as our tapwater is very alkaline, ranging from 7.8 to 8.6 depending on the time of year. This was poured back into the glass jar and allowed to cool overnight.

The following day I sterilized the three liter plastic jug, cut a whole in the cap that would accomodate the rubber cork that the airlock fits into. I poured the whole mixture into the plastic jug, leaving a small amount of sludge behind, added a crushed campden tablet to this mix, fit the airlock and let it stand for 24 hours.

The last step was to add yeast (I always use Montrachet) and a small amount of yeast nutrient and cover it up to keep it out of the sunlight. Right now it's been 26 hours since I pitched the yeast, and there is only a small amount of bubbles forming at the top. I expect fermentation to start slowly, as I did not add as much yeast nutrient as I would have liked, and my yeast is not as fresh as I'd like. I do expect it to ferment eventually, though, and even if it doesn't, I won't deviate from this process if I had to do it over again.


As a side note, I don't know what the starting specific gravity was, due to an unfortunate situation with the drawer my hydrometer was in. However, 2.5 pounds of sugar per gallon of must is a pretty average ratio for a semi-sweet wine. I prefer mine a little sweeter than that,  so with 2 pounds in 3 liters, I've got a ratio of about 2.75 pounds per gallon, which should leave a sweet wine with fairly high alcohol content.

Recipe reference:

http://www.jackkeller.net  <-- this site is LOADED with useful info for home winemaking.


Dandelion wine recipe:

2.5 quarts of dandelion petals
1/2 cup of whole dandelion flower heads with no stems
1 quart cut rhubarb
2 pounds sugar
zest from 1 lemon
juice from one lemon
1 tsp yeast nutrient
1 packet yeast